8
Using the Lexmark Solution Center
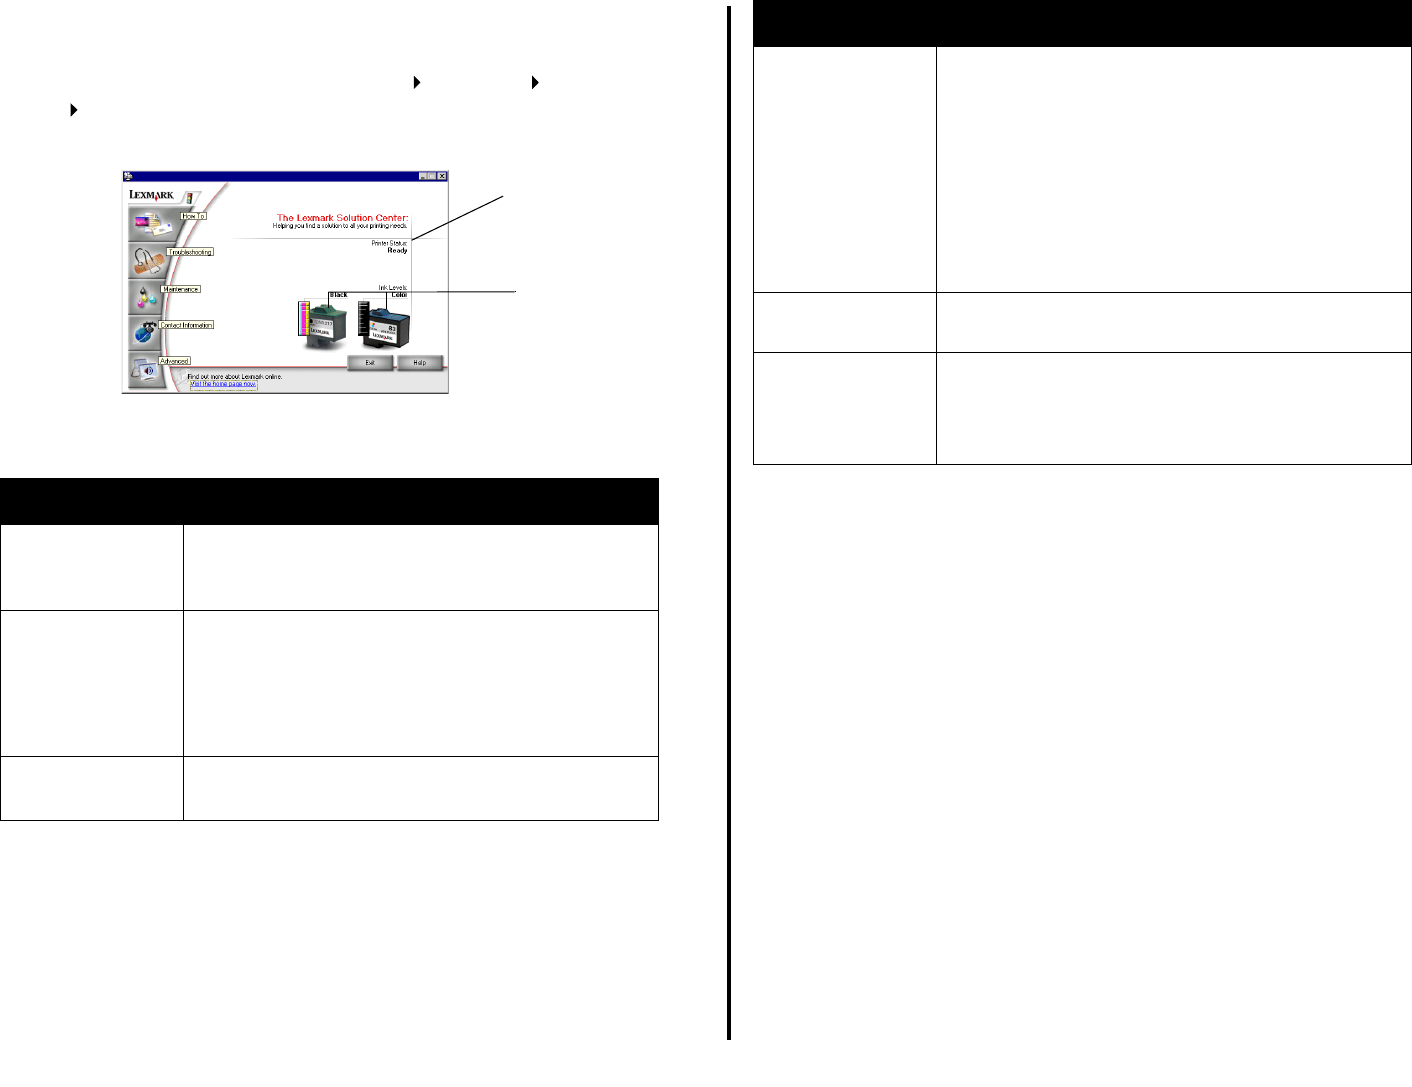
The Lexmark 1200 Series Solution Center is a valuable information resource. To
open the Lexmark Solution Center, click Start Programs Lexmark 1200
Series Lexmark 1200 Series Solution Center.
The Printer Status tab appears.
The Lexmark Solution Center consists of six tabs: Printer Status, How To,
Troubleshooting, Maintenance, Contact Information, and Advanced.
Note: For more information, click the Help button located in the lower right
corner of the screen.
From this tab: You can:
Printer Status
(Main dialog box)
• View the status of the All-In-One. For example, while
printing, the status is Busy Printing.
• View the ink levels of the print cartridges.
How To Learn how to:
• Scan, copy, fax, and print.
• Find and change settings.
• Use basic features.
• Print projects such as banners and iron-on
transfers.
Troubleshooting • Learn tips about the current status.
• Solve All-In-One problems.
Printer Status
Ink levels
Maintenance • Install a new print cartridge.
Note: Wait until scanning is complete before installing
new cartridges.
• View shopping options for new cartridges.
• Print a test page.
• Clean to fix horizontal streaks.
• Align to fix blurry edges.
• Troubleshoot other ink problems.
• Remove Japanese postcard residue.
Contact
Information
• Learn how to contact Lexmark by phone, e-mail, or on
the World Wide Web.
Advanced • Change the appearance of the Printing Status window
and turn printing voice notification on or off.
• Change the network settings for the printer.
• Obtain software version information.
From this tab: You can:


