


4076-0XX
44
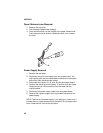
Right Side Frame Removal
1. Remove the top cover.
2. Remove the print cartridge.
3. Remove the auto sheet feed.
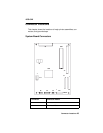
4. Disconnect the print head cables from the system board. You
may have to open the print head cable connectors on the system
board first, then disconnect the cables.
5. Disconnect connectors J4, J5, and J6 from the system board.
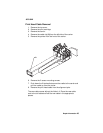
6. Remove the machine from the base. To do this, push the frame
latches out as you lift the machine from the base. Set the
machine aside.
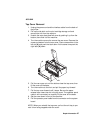
7. Move the carrier in line with the opening in the carrier transport
motor frame.
8. Reach through the opening and pull the belt from the carrier.
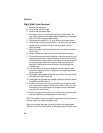
9. To unlock the carrier guide rod latches, rotate the rod top-to-rear.
Gently push the carrier rod guide latches, at each end of the rod,
to the rear and lift up the rod until the sensor on the carrier clears
the encoder strip. Remove the carrier rod guide through the
opening in the left side frame. Be careful not to damage the
encoder strip.
10. Pull the ends of the print head cables into the machine, then
remove the cables from the 4 retainers in the paper guide start-
ing from the right.
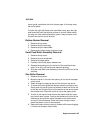
11. Disengage the left paper guide latch by carefully moving the rear
of the left side frame to the left.
12. Disengage the right side of the paper guide from the latch and lift
the guide from the machine.
13. A latch on the top front end of each side frame holds the trans-
port motor frame in place. Push up the latches on the front of the
side frames, then pivot the carrier transport motor frame down
and out of the side frames.
14. Place the machine on its back, then unlatch the right frame latch
from the middle frame and remove the side frame.
NOTE: for reassembly you may want to remove the carrier guide and
reinstall it after you install the paper guide.
When you reinstall the paper guide, be sure the front edge goes
under the rear of the carrier guide. If the paper guide is on top of the