


4076-0XX
Repair Information 47
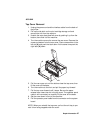
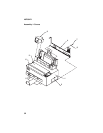
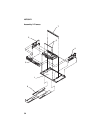
Top Cover Removal
1. Unplug the power cord and the interface cable from the back of
the printer.
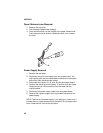
2. Pull up the tab latch on the print cartridge storage unit and
remove the unit from the machine.
3. Unlatch the auto sheet feed left cover by pushing it up from the
bottom, then slide it off the machine.
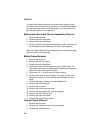
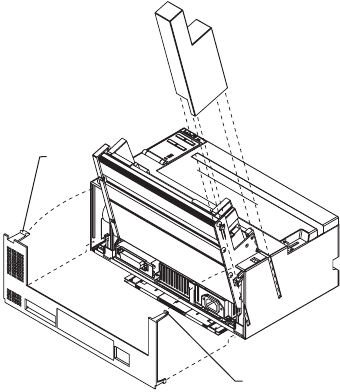
4. Turn the machine around to remove the rear cover. Remove the
screw and washer from the rear cover. Place a screwdriver in the
left slot [A] and push the latch down. At the same time push the
right latch [A]down.
5. Pull the rear cover out until the latches clear the top cover, then
lift the cover off the base.
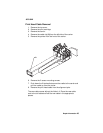
6. Turn the machine to the front and pull the paper tray forward.
7. Pull the top cover forward until it stops. Be sure the paper
release lever clears the slot in the top cover. The operator panel
cable is still connected, so carefully lift the cover off the base.
8. Set the cover down in front of the machine.
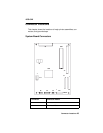
9. Pull the operator panel cable from the connector on the system
board.
NOTE: When you reinstall the top cover, pull out the exit tray to pre-
vent it from being trapped under the cover.
A
A