


Diagnostic Information 2-29
4227-X00
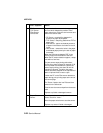
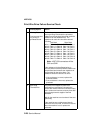
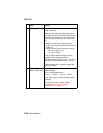
3 Auto Gap If printhead is firing, manually rotate the carrier
shaft during printing by pushing down on the
auto gap home sensor flag.
If printing starts and is correct, go to the
“Auto
Gap Service Check” on page 2-10.
4 Printhead Cables Inspect for improper connection or damage.
5 Sub Logic Board If there is carrier motion but no printhead noise,
and the printhead cables do not appear to be
the problem, replace the sub logic board.
6 Ribbon A problem with the ribbon shield can keep the
print wires too far from the page.
Inspect the ribbon shield. When the printer is
Ready with the ribbon installed, make sure the
ribbon shield can float slightly front to back.
7 Printhead The printhead probably is not the problem if
thereisnoprinting.
Check the winding resistances as described
above and look for open circuits or shorts
between neighboring pins.
Do not replace the printhead unless a specific
problem is found.
8 Main Logic Board If no other problem is found, replace the main
logic board, retaining the old board for
reinstallation if the problem is not fixed.
Set the
“Bidirectional Print Adjustment” on
page 4-4
and the “Printhead-to-Platen Gap
Adjustment” on page 4-2
.
FRU/Symptom Action