


4-30 Service Manual
4227-X00
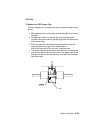
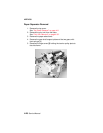
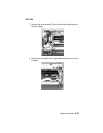
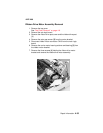
Power Supply Removal
CAUTION: Thepowersupplymaybehot.
1. Turn off the printer and disconnect the power cord at both ends.
2. Remove the top cover.
See “Top Cover Removal” on page 4-6.
3. Disconnect the power connectors from the sub logic board and
main logic board.
4. Remove the five mounting screws and the ground wire screw.
5. Lift the rear edge of the supply and remove it from the printer.
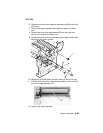
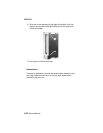
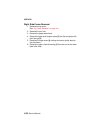
Power Supply Fan Removal
1. Remove the power supply.
2. Remove the four screws holding the power supply board to the
cover.
3. Pivot the board out of the cover far enough to disconnect the fan
connector.
4. Remove the three screws holding the fan to the cover.
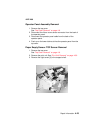
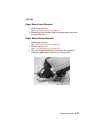
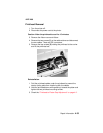
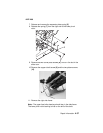
PrintUnitRemoval
1. Remove the top cover.
See “Top Cover Removal” on page 4-6.
2. Disconnect the tractor connector.
3. Disconnect the flexible signal cable and the power cable from
the sub logic card.
4. Remove the ground leads from the four corners of the print unit.
5. Disconnect the following connectors from the main logic board:
CN4, CN7, CN8, CN9, CN10, CN15, CN18, CN19, and CN20.
6. (4227-200) Disconnect CN17. Remove the upper screw from
the serial port card mounting bracket.