


4-22 Service Manual
4227-X00
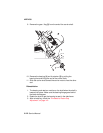
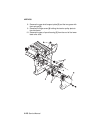
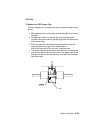
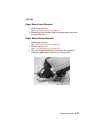
Main Logic Board Removal
1. Remove the top cover.
See “Top Cover Removal” on page 4-6.
2. Disconnect all cables connected to the main logic board.
3. Remove the three screws at the rear edge of the board and
remove the board.
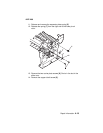
4. Remove the EPROM from the old board and install it on the new
one.
Reinstallation:
After replacing the main logic board, recheck the “Bidirectional Print
Adjustment” on page 4-4 and the “Printhead-to-Platen Gap
Adjustment” on page 4-2.
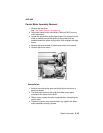
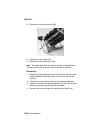
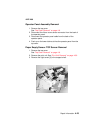
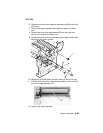
Memory Module Removal
The Memory Module is an option.
1. Turn the printer Off and disconnect the power cord at the
printer.
2. Remove the rear cover.
3. Remove the paper support.
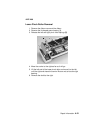
4. Insert a small flat screwdriver under each end of the module
and lift up gently. Do not insert the screwdriver too deep, or the
main logic board may be damaged.
Note: Be careful not to bend the pins when you re-install the
module.