


For Macintosh users
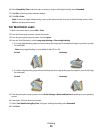
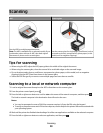
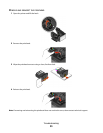
1 Load an original document faceup into the ADF or facedown on the scanner glass.
2 From the Finder desktop, double-click the printer program folder.
3 Double-click the printer Center to open the All-In-One Center.
4 From the “What is being scanned?” menu on the main screen, select a document type.
5 From the “How will the scanned image be used?” menu, choose To be viewed on monitor/web page.
6 From the “Send scanned image to” menu, choose an application.
7 Click Scan.
8 Retrieve the scanned image from the application, and then send it through e-mail as an attachment.
Scanning to a PDF
For Windows users
1 Load an original document faceup into the ADF or facedown on the scanner glass.
2 Click or Start.
3 Click All Programs or Programs, and then select the printer program folder from the list.
4 Select Printer Home.
5 Choose your printer from the printer drop-down list.
6 Click PDF.
Scanning starts and the scan progress dialog appears.
7 Save the document as a PDF.
For Macintosh users
1 Load an original document faceup into the ADF or facedown on the scanner glass.
2 From the Finder desktop, double-click the printer program folder.
3 Double-click the printer Center to open the All-In-One Center.
4 From the “What is being scanned?” menu on the main screen, choose a document type.
5 Customize the settings as needed.
6 Click Scan.
7 Save the document as a PDF.
Canceling scan jobs
Press on the printer control panel, or click Cancel on the computer screen.
Scanning
30