


6 Touch Color.
7 Touch E-mail It.
Using profiles
Creating an e-mail profile
1 Open a Web browser.
2 In the address bar, type the IP address of the printer, and then press Enter.
3 Click Configuration.
4 Click E-mail/FTP Settings.
5 Click Manage E-mail Shortcuts.
6 Fill in the fields with the appropriate information.
7 Click Add.
E-mailing to a profile
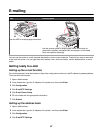
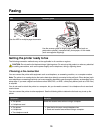
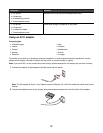
1 Load an original document faceup, short edge first into the ADF or facedown on the scanner glass.
Note: Do not load postcards, photos, small items, transparencies, photo paper, or thin media (such as magazine
clippings) into the ADF. Place these items on the scanner glass.
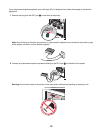
2 If you are loading a document into the ADF, adjust the paper guides.
3 On the home screen, touch Held Jobs.
4 Touch Profiles.
5 Select an e-mail destination from the profile list.
6 Touch E-mail It.
Customizing e-mail settings
Adding e-mail subject and message information
1 Load an original document faceup, short edge first into the ADF or facedown on the scanner glass.
Note: Do not load postcards, photos, small items, transparencies, photo paper, or thin media (such as magazine
clippings) into the ADF. Place these items on the scanner glass.
2 If you are loading a document into the ADF, adjust the paper guides.
3 On the home screen, touch E-mail.
4 Type an e-mail address.
5 Touch Options.
6 Touch Subject.
7 Type the e-mail subject.
8 Touch Done.
70