


Working It
Front Panel Features
2•
3
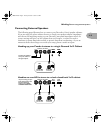
As you come across your own favorite settings that you’d like to keep, you can save
them to the A, B, C and D buttons to replace the factory presets. Just hold down any of
A, B, C or D buttons for about 3 seconds until all of them flash and presto—Duoverb
has now memorized your custom tone for easy recall! See
Using The Channel
Memories
on page 2•5 for more detail. The Line 6 FBV class foot controllers let you
select these channel memories with your feet—and expand the total number of
memories available to a total of 36.
Chapter 4
has got the details.
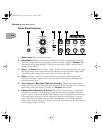
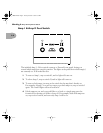
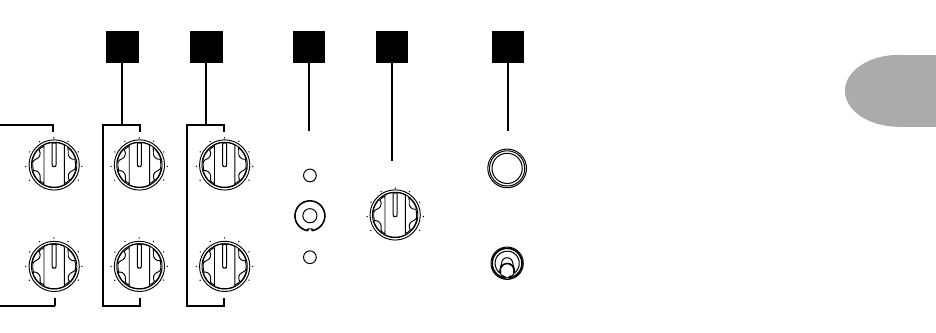
7. Amp Volume:
Use these knobs to balance levels between Amp 1 and Amp 2.
8. Reverb:
You get to decide how much of Duoverb’s luxurious model of spring reverb
each amp gets. Use just a little to subtly add ambience, or crank up for vintage spring
reverb style sproi-oi-oi-oing!
9. Blend - Split Switch:
Flick the switch up to have Amp 1 & 2
blended
so both amps
feed both speakers, or flick it down to have the amps
split
so Amp 1 comes from the left
speaker only, and amp 2 from the right only.
Note:
Duoverb will remember the
SPLIT/BLEND
combinations for both single amp configurations and dual amp
configurations when you save a channel. This control is here because we’ve found that
running two amps in SPLIT mode can sound
huge
. When running a single amp, you’ll
probably want BLEND mode, so sound is coming through both speakers.
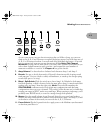
10. Master:
Sets the overall volume of your Duoverb. Spin this to set your basic loudness,
then use the amp Volume knobs to balance the levels between
Amp 1
and
Amp 2
, as well
as the relative volume of the sounds you store with the A, B, C, D buttons.
11. Power Switch:
Flip the big metal switch to apply power to the dilithium crystal mounted
on the front panel above it.
9
10
7 8
11
PRESENCE REVERB
MASTER
VOLUME
SPLIT
BLEND
010
POWER
010
010 010 010
010 010
Duet Manual Page 3 Tuesday, October 1, 2002 9:36 PM