14
Chapter 4: Configuring the ADSL Modem
The Setup Tab
ADSL Modem
When finished making your changes on this tab, click the Save Settings button to save these changes, or click
the Cancel Changes button to undo your changes.
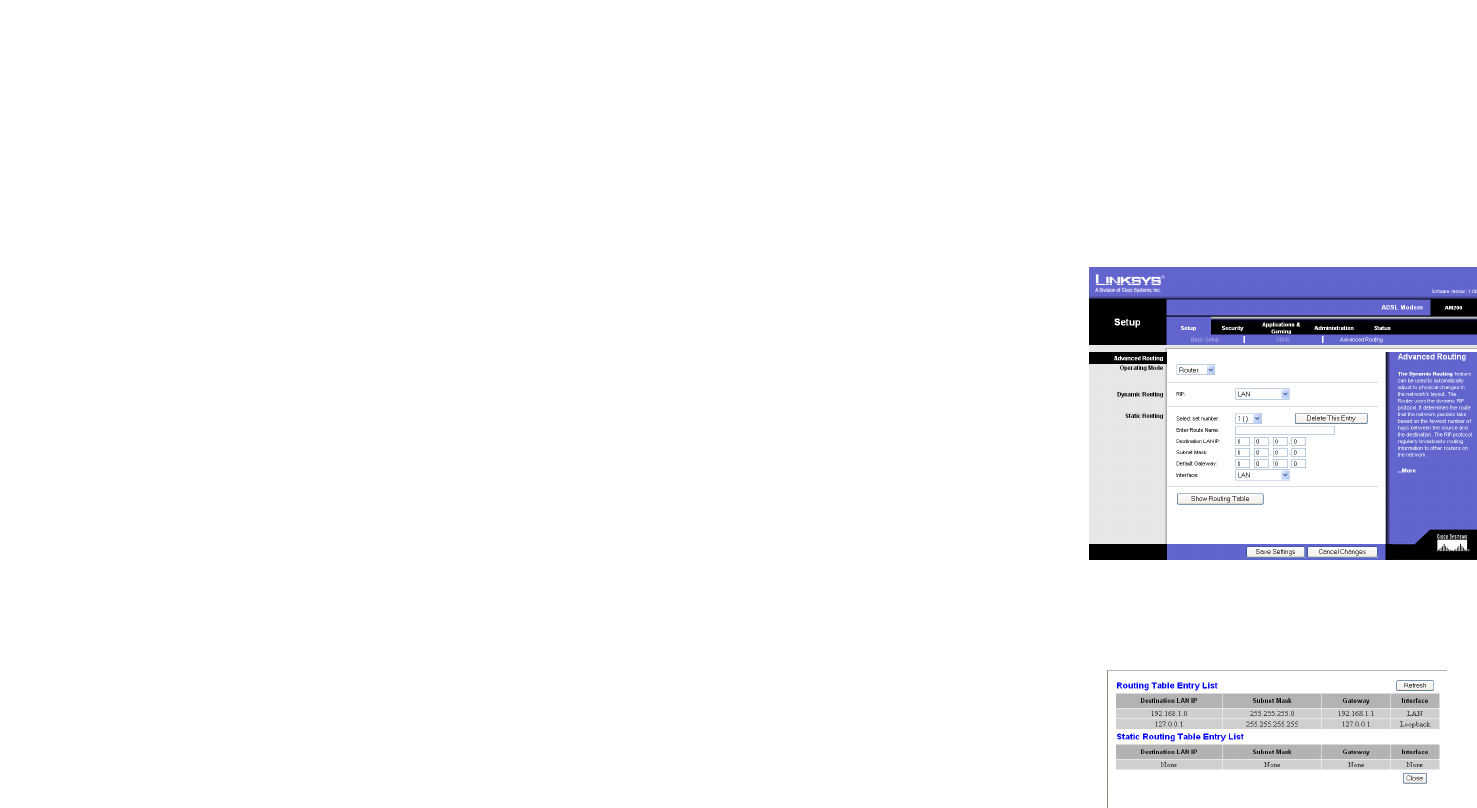
Advanced Routing
The Advanced Routing screen allows you to configure the dynamic routing and static routing settings.
• Operating Mode. If you want to use Static Routing, select Gateway from the drop-down menu. If you have
more than one router in your network and you need to use Dynamic Routing, select Router from the
drop-down menu.
• Static Routing. If the Modem is connected to more than one network, it may be necessary to set up a static
route between them. A static route is a pre-determined pathway that network information must travel to
reach a specific host or network. To create a static route, change the following settings:
• Select set number. Select the number of the static route from the drop-down menu. The Modem supports
up to 20 static route entries. If you need to delete a route, after selecting the entry, click the Delete This
Entry button.
• Enter Route Name. Enter a reference name for the defined route.
• Destination LAN IP. The Destination IP Address is the address of the remote network or host to which you
want to assign a static route. Enter the IP address of the host for which you wish to create a static route. If
you are building a route to an entire network, be sure that the network portion of the IP address is set to 0.
• Subnet Mask. The Subnet Mask (also known as the Network Mask) determines which portion of an IP
address is the network portion, and which portion is the host portion.
• Default Gateway. This IP address should be the IP address of the gateway device that allows for contact
between the Gateway and the remote network or host.
• Interface. Select your interface from the drop-down menu. Select LAN or WAN (Internet).
• Show Routing Table. Click the Show Routing Table button to open a screen displaying how data is routed
through your LAN. For each route, the Destination LAN IP, Subnet Mask, Gateway, and Interface are displayed.
Click the Refresh button to update the information. Click the Close button to return to the previous screen.
When finished making your changes on this tab, click the Save Settings button to save these changes, or click
the Cancel Changes button to undo your changes.
F
i
g
u
r
e
4
-
1
2
:
A
d
v
a
n
c
e
d
R
o
u
t
i
n
g
F
i
g
u
r
e
4
-
1
3
:
R
o
u
t
i
n
g
T
a
b
l
e


