


Chapter 2
How to Use the PrintServer
4
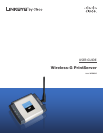
Wireless-G PrintServer
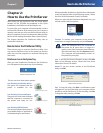
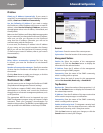
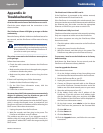
Program Icon Accessed through the Start Menu
The PrintServer program icons appear in the Start menu.
To access these icons, click Start. Select Programs. Select
Linksys PrintServer.
Start Menu > Programs >PrintServer Program Icons
You will have four options available:
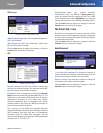
PrintServer Utility To access the PrintServer Utility, click
PrintServer Utility. Refer to the following section, “About
the PrintServer Information Screen”, for details.
Setup Computer To run the wizard that sets up the
PrintServer driver, click Setup Computer. Refer to the
Quick Installation for details.
Setup PrintServer To run the wizard that sets up the
PrintServer, click Setup PrintServer. Refer to the Quick
Installation for details.
Uninstall To uninstall the PrintServer from your computer,
click Uninstall.
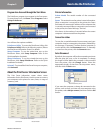
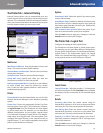
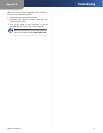
About the Print Server Information Screen
The Print Server Information screen shows status
information for the PrintServer. Use this screen to connect
your computer to the printer for scans, faxes, or usage of
a memory card.
Print Server Information
Connected Disconnected
Printer Information
Printer Model The model number of the connected
printer.
Status This section shows the printer’s status information.
When a computer is connected to the printer, the Status
field states the name and IP address of the computer that
is currently connected. When a computer is not connected
to the printer, the Status field says, “On-Line”.
Also shown is the number of seconds before the current
computer is disconnected from the printer.
Connection status
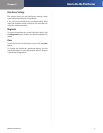
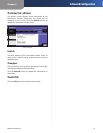
To scan, fax, or read information from a memory card, your
computer must be connected to the printer, indicated by
the message, “Connected”. To allow another computer to
use the printer, click the Disconnect button. To manually
re-connect to the printer, click the Connect button.
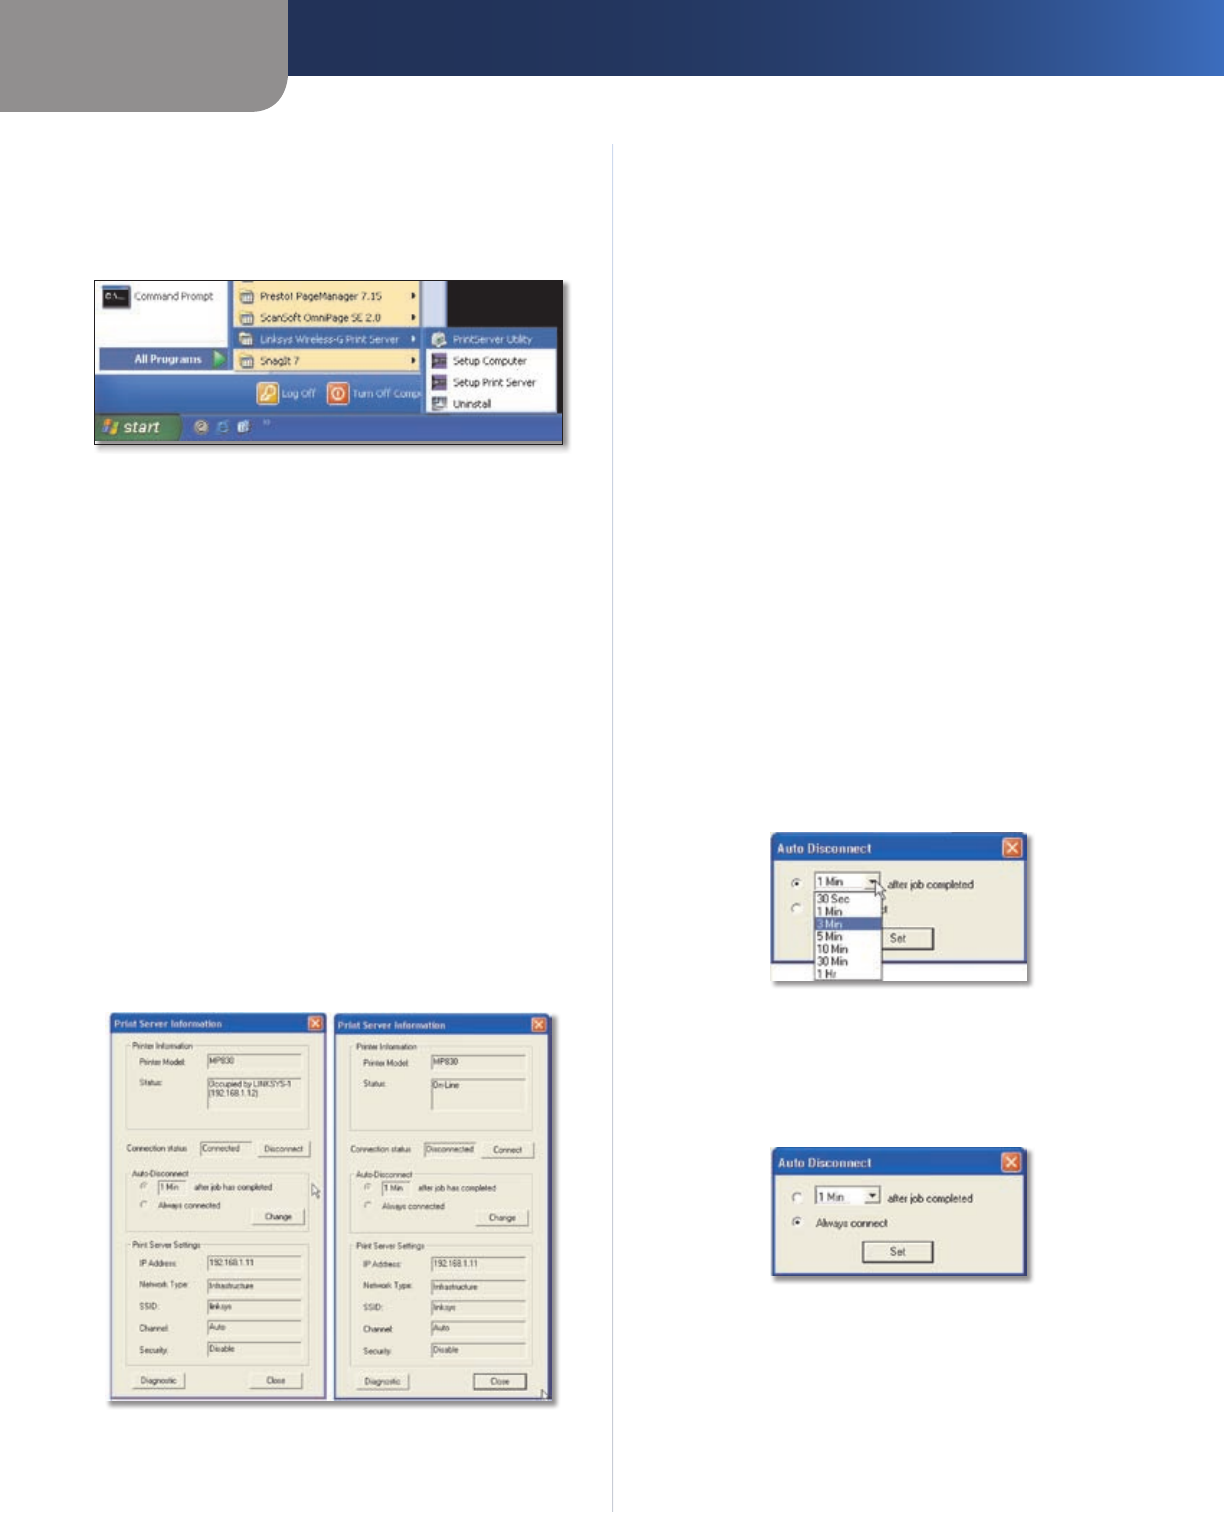
Auto-Disconnect
By default, the computer will be disconnected one minute
after the print job, scan, or fax is completed. To change
the length of time before the computer is disconnected
from the printer, click the Change button. Select the
appropriate length of time from the drop-down menu,
and then click the Set button.
Auto-Disconnect, time
If you want the computer to always be connected to the
printer, such as when you have only one computer using
the printer, select Always connect, and then click the Set
button.
Auto-Disconnect, Always connect