3. Using the Keyboard and Mouse
This wireless keyboard and mouse combo consists of a receiver that plugs into the
computer, a wireless keyboard, and a wireless mouse.
3.1 Hardware Installation
3.1.1 Getting the Receiver Ready
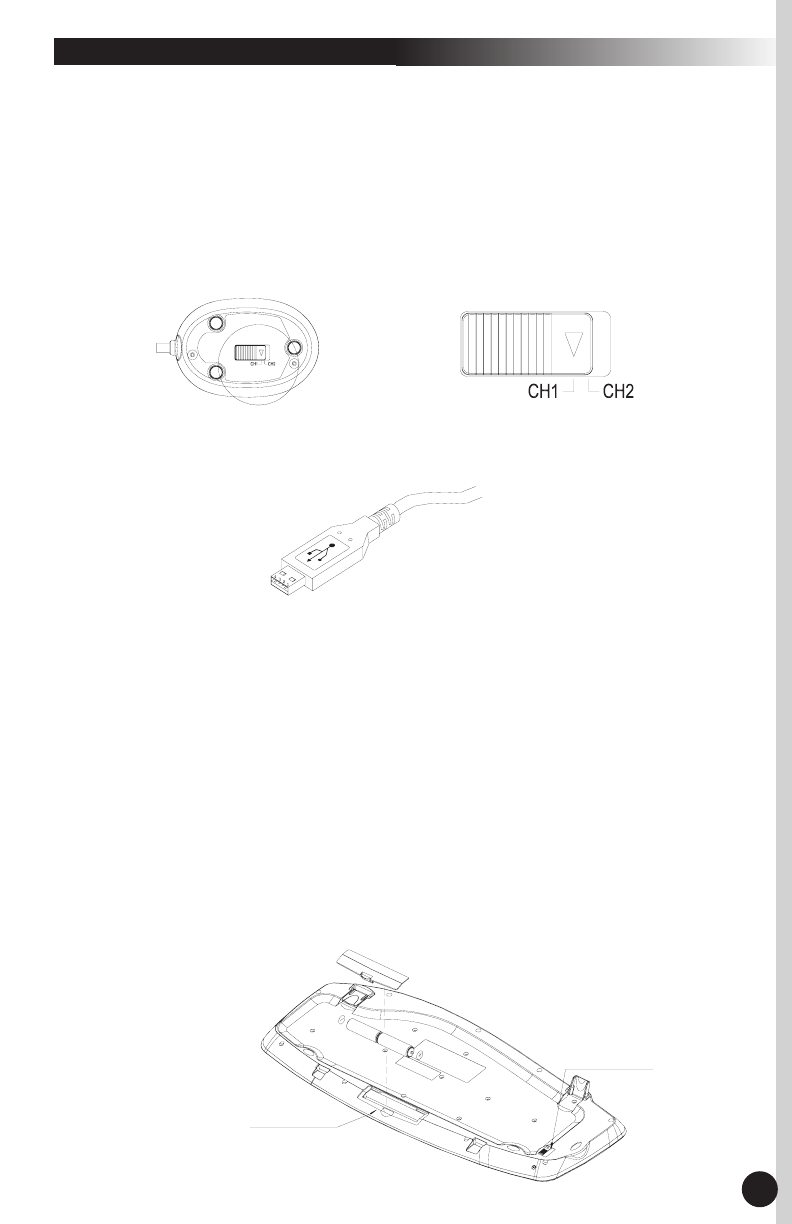
Connect the receiver and select a wireless channel:
1. Make sure your PC is switched off.
2. Turn the receiver over and find the channel slide switch. Select either channel
CH1 or CH2. Remember which channel you selected.
3. Connect the receiver to your PC by plugging the receiver's USB connector into your PC.
4. Set the receiver on a flat surface and follow these guidelines:
a. There should be a minimum of 8 inches clearance between the receiver and other
electronic devices.
b. There should be a minimum of 8 inches clearance between the receiver and the
monitor.
c. The distance between the receiver and the wireless mouse or keyboard should not
exceed 4.92 feet.
d. For better reception, the receiver works best on a nonmetallic surface.
Receiver Channel Slide Switch
2
3.1.2 Getting the Keyboard Ready
Install the two AA alkaline batteries (provided) into the keyboard and select a wireless channel:
1. Turn the keyboard over and find the battery compartment. Lift the cover.
2. Insert the included AA alkaline batteries into the compartment. Make sure the batteries
are placed in the correct direction by following the polarity signs in the battery
compartment.
Bottom View of Keyboard
Channel Slide Switch
Battery Compartment
