


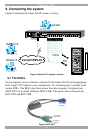

SMART 216 / 232 IP
13
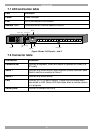
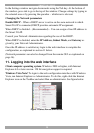
In the Settings window navigate downwards using the Tab key. At the bottom of
the window, press tab to go to the top of the window. Change settings by typing in
the selected area or by pressing the spacebar – whichever is relevant.
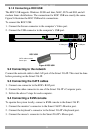
Changing the Network parameters
Enable DHCP – When a DHCP server is active on the same network to which
Smart 216 IP is connected, DHCP provides automatic IP assignment.
When DHCP is disabled – (Recommended) – You can assign a fixed IP address to
the Smart 216 IP.
Consult your Network Administrator regarding the use of the DHCP.
When DHCP is disabled, enter the IP Address, Subnet Mask, and Gateway as
given by your Network Administrator.
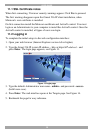
Once the IP address is satisfactory login to the web interface to complete the
configuration, as explained in section 11 below.
(Network parameters can also be changed from the remote GUI as explained on
page 16).
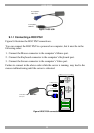
11. Logging into the web interface
Client computer operating system. Windows 2000 or higher, with Internet
Explorer 6.0 or later version. 128 bit encryption support is required.
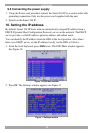
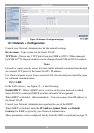
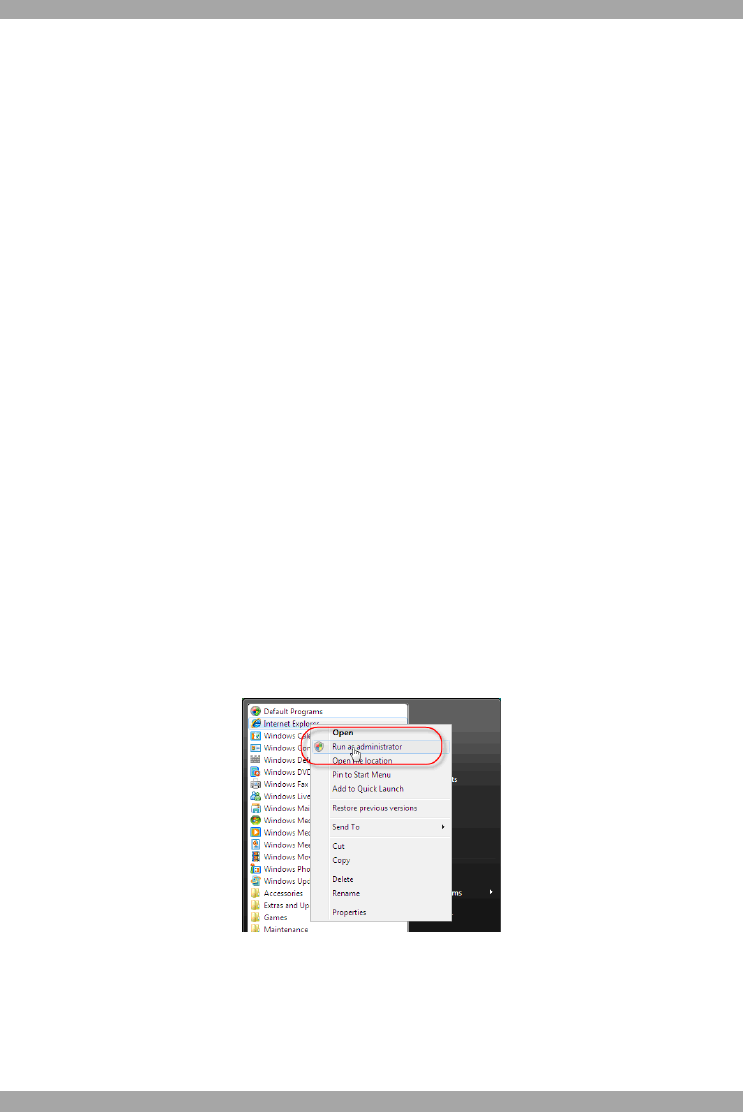
Windows Vista Note! To login to the web configuration interface with Windows
Vista, run Internet Explorer as Administrator. To do this, right-click the Internet
Explorer icon on the Taskbar and select Run as administrator. See figure below.
Figure 12 Select Run as administrator