34
7.1. Battery Replacement Procedure
(QUALIFIED SERVICE PERSONNEL ONLY)
This UPS system does not have Hot-swappable batteries. The UPS system
must be turned Off to perform the Battery Replacement.
7.1.1 Turn Off all the equipment that is connected to the UPS.
7.1.2 Press the Off switch on the front panel of the UPS for approximately 5-
seconds.
7.1.3 Turn the input circuit breaker on the rear panel of the UPS to the Off
position.
7.1.4 Turn the utility power circuit breaker at the service panel to the Off position.
7.1.5 Disconnect all of the communications and network cables from the rear
panel of the UPS.
NOTE: If you are using an External Battery Pack, turn ALL of the DC circuit breaker
(s) on the rear panel of the Battery Pack (s) to the Off position. Disconnect the all of
the battery cables from the UPS and the Battery Pack (s) rear panels.
7.1.6 Remove the retaining screws for the top cover on the rear panel of the UPS.
7.1.7 Slide the top cover towards the rear of the UPS and lift up to remove the top
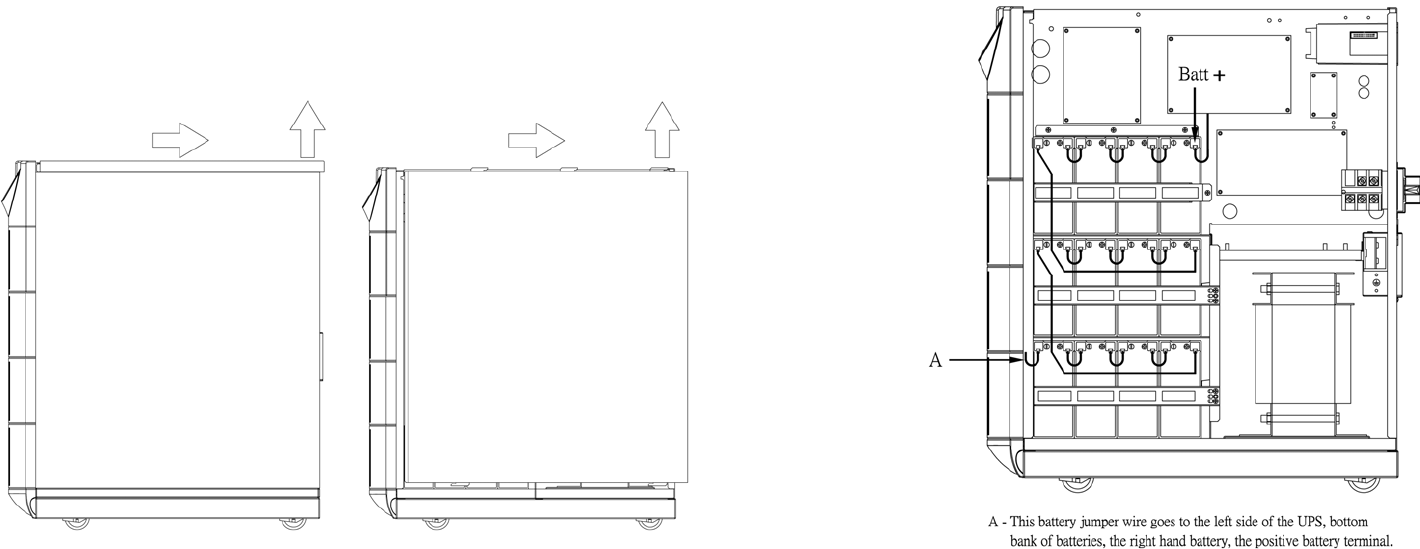
cover and set aside. (FIG. 1)
7.1.8 Remove the retaining screws for the side panels on the rear panel of the
UPS.
7.1.9 Slide the side panels towards the rear of the UPS and lift up to remove the
side panels and set aside. (FIG. 2)
FIG. 1 FIG. 2
35
7.1.10 Looking from the front of the UPS on the right-hand side (FIG. 3),
disconnect the battery positive (Red) wire. Place a piece of electrical tape
over the end of battery positive (Red) wire.
7.1.11 Disconnect battery jumper “A” and place a piece of electrical tape over the
end of battery jumper wire “A”.
7.1.12 Disconnect all of the battery jumper wires.
7.1.13 Remove the battery-retaining bracket retaining screws.
7.1.14 Remove the battery-retaining brackets.
7.1.15 Remove the defective batteries and set aside.
7.1.16 Install the new batteries in the same position as the original batteries.
7.1.17 Re-install the battery-retaining brackets.
NOTE: DO NOT pinch the battery wires between the batteries and the battery-
retaining brackets.
7.1.18 Re-install the battery-retaining bracket retaining screws.
7.1.19 Observer polarity. Reconnect all of the battery jumper wires.
7.1.20 Remove the piece of electrical tape from the end of battery jumper wire “A”.
Observer polarity. Reconnect battery jumper wire “A”.
NOTE: DO NOT Reconnect the battery positive (Red) wire at this time.
FIG. 3


