EN-22
CONTRAST
IMAGE
0
BRIGHTNESS 0
6500K
0
COLOR
AUTO
0
SVGA60
AUTO
TINT
0SHARPNESS
COLOR TEMP.
GAMMA MODE
WHITE ENHANCE
opt.
AV MEMORY 1
IMAGE
REVERSE
OFF
AUTO POWER
ON
OFF
AUTO POWER
OFF
KEYSTONE
ON
INSTALLATION
ON
BACK COLOR
OFF
BLUE
SVGA60
SPLASH
SCREEN
0
opt.
STANDARDLAMP MODE
AV MEMORY 1
FEATURE
AUTO
SVGA60
AUTO
AUTO
opt.
MENU POSITION
CINEMA MODE
VIDEO SIGNAL
?
ASPECT
RESET ALL
English
LANGUAGE
A
Ë
OK
MENU
ACCESS
PASSWORD
FUNCTION
1.
AV MEMORY 1
R G B
R G B
SIGNAL
HORIZ. POSITION 0
VERT. POSITION 0
TRACKING 0
COMPUTER
INPUT
RGB
SET UP
AUTO
FINE SYNC. 0
USER
SVGA60
opt.
OK
ON
HOLD
AV MEMORY 1
Menu operation (continued)
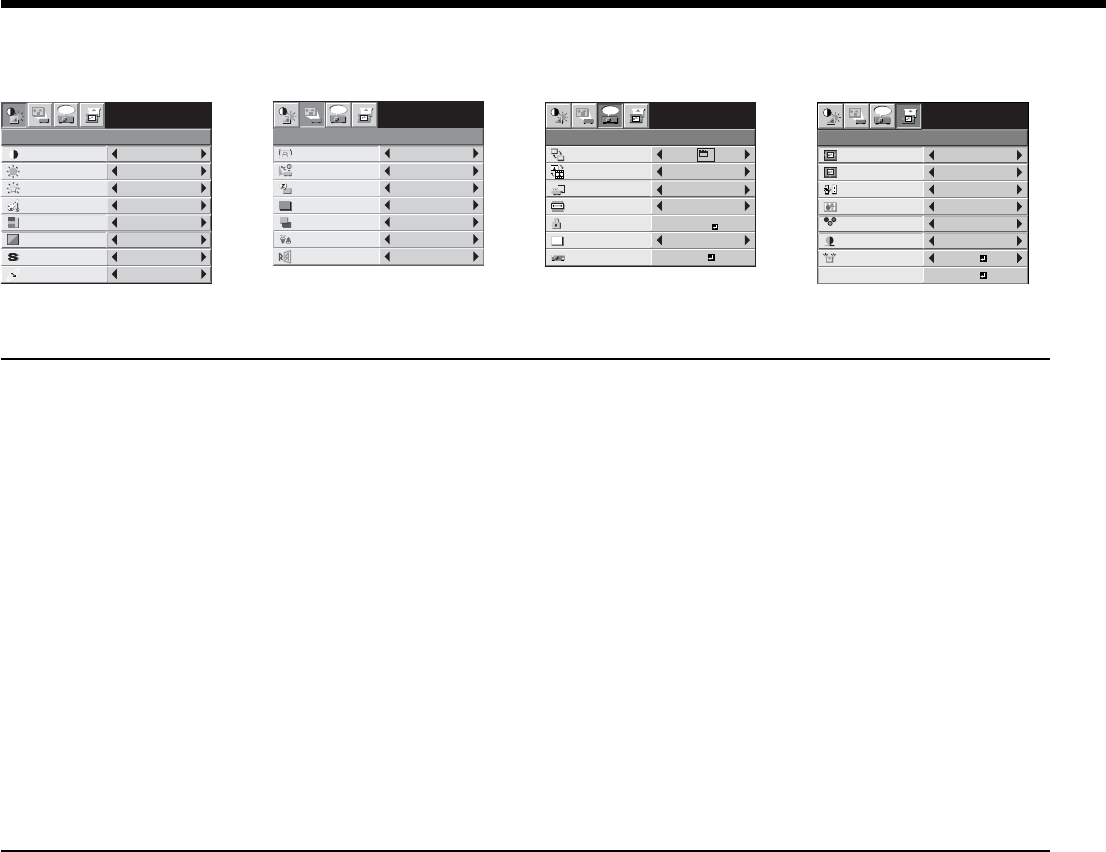
Available settings in the menus
Set the following items on their relevant menus.
1. IMAGE menu 2. INSTALLATION menu 3. FEATURE menu 4. SIGNAL menu
1. IMAGE menu
ITEM SETTING FUNCTION
CONTRAST
±
30 Use to adjust the contrast of the projected image. (See Page 24.)
BRIGHTNESS
±
30 Use to adjust the brightness of the projected image. (See Page 24.)
WHITE ENHANCE
AUTO / 0 - 10
Use to enhance only the white level of the image. Select AUTO for normal use.
(See Page 24.)
COLOR TEMP.
5 options Use to adjust the color temperature. (See Page 25.)
COLOR
±
10 Use to adjust the color thickness of the projected image. (See Page 24.)
TINT
±
10 Use to adjust the color tint of the projected image. (See Page 24.)
SHARPNESS
±
5 Use to adjust the sharpness of the projected image. (See Page 24.)
GAMMA MODE AUTO The proper gamma mode is automatically selected depending on the input
signal. Default is AUTO. THEATER1 is automatically selected for Video
equipment image input signals such as 480i and 720p and STANDARD for
computer image input signals such as XGA and SVGA.
STANDARD Select to secure the contrast even when the room lighting is increased to some
extent.
THEATER1 Select when watching movies in dim lighting as in a theater.
THEATER2 Select to gain the halftone to make the skin color more vibrant even in a dark
scene. This mode is suitable for TV viewing.
• For more enhanced color reproduction, set WHITE ENHANCE to 0. The white portion of the color wheel will be
disabled and you can reproduce true-to-life images.
2. INSTALLATION menu
ITEM SETTING FUNCTION
KEYSTONE
±
20 Use to correct vertical keystone distortion.
AUTO POWER ON ON / OFF
When ON is chosen, the lamp is automatically lit when the power cord is
plugged in the wall outlet. Choose ON when using the projector mounted on
the ceiling.
• The projector is in the stand-by mode when the lamp is off. Use the remote
control to turn on the lamp.
AUTO POWER OFF OFF / 5 - 60min
Use to set the time elapsed before the projector enters the stand-by mode
when there is no signal input from the source.
SPLASH SCREEN
ON / OFF Choose ON to display the splash screen when the power is turned on.
BACK COLOR BLUE / BLACK
Use to change the color of the screen that appears when no signal is supplied.
LAMP MODE STANDARD Select this option when you want to view images in a well-lit room.
LOW Select to moderate the intensity of the lamp. The operating sound is reduced
and the lamp lifetime becomes longer.
• Frequent switching of the lamp mode may damage the lamp.
IMAGE REVERSE
OFF Select when viewing images from the front with the projector installed on the
fl oor.
MIRROR Select when viewing images projected from the behind of the screen with the
projector installed on the fl oor.
INVERT Select when viewing images projected from the behind of the screen with the
projector installed on the ceiling.
MIRROR INVERT Select when viewing images from the front with the projector installed on the
ceiling.
• The STANDARD lamp mode is activated by default whenever the projector is turned on. When the LOW lamp
mode has been chosen, the default STANDARD lamp mode is switched to the LOW lamp mode in 1 minute.


