EN-10
Setting up your projector
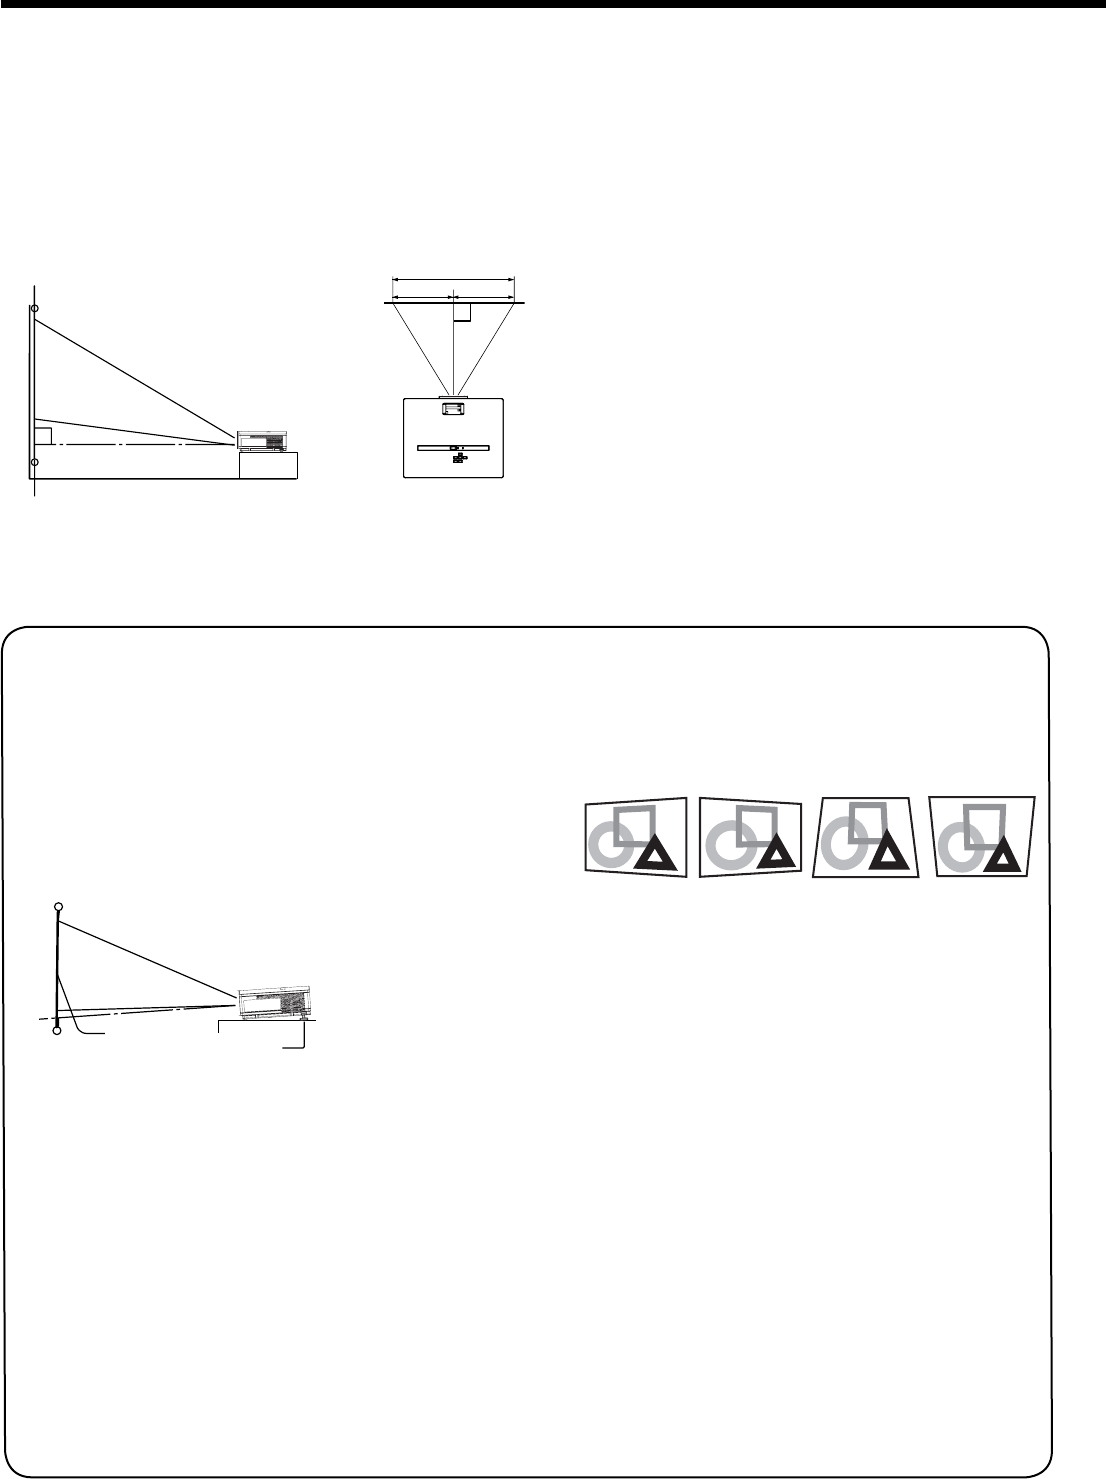
W
A
A=B
B
Setting up the screen
Install the screen perpendicularly to the projector. If the screen can not be installed in such a way, adjust the
projection angle of the projector. (See below.)
• Install the screen and projector so that the projector’s lens is placed at the same height and horizontal position of
the screen center.
• Do not install the screen where it is exposed to direct sunlight or lighting. Light directly refl ecting on the screen
makes the projected images whitish and hard to view.
Basic setup
Determine the distance from the screen to the projector according to the size of the images to be projected. (See
page 11.)
• Do not place this projector on a carpet or blanket because the exhaust vent and the intake vent on the bottom
surface are blocked and the inside of the projector is heated, causing a breakdown or fi re.
• Depending on the installation conditions, warm air that is emitted from the exhaust vents may fl ow into the intake
vent, causing the projector to display “TEMPERATURE!!” and then stop projecting images.
Adjusting the projection angle
This projector is provided with 3 feet for adjusting
the projection angle on the bottom surface. Adjust
the projection angle depending on the position of
the projector.
Adjustment of the projection angle
For the best projection, project images on a fl at
screen installed at 90 degrees to the fl oor. If
necessary, tilt the projector using 2 adjustment feet
on the bottom of the projector.
1. Tilt up the projector to the appropriate angle.
2. Press the foot adjustment buttons next to the
adjustment feet (rear), and the adjustment feet
will come out.
3. Release the buttons to lock the adjustment feet
(rear) to that position.
4. Rotate the adjustment feet (rear) for fi ne
adjustment.
After using the projector:
5. Put the adjustment feet (rear) back into the
projector by pressing the foot adjustment
buttons.
• If necessary, rotate the adjustment foot (front) for
fi ne adjustment.
Keystone adjustment
• To correct vertical and horizontal keystone distor-
tion, press the KEYSTONE button on the projector
or the remote control to display KEYSTONE, and
adjust the image by pressing the , , or
button (or VOLUME + or - button on the remote
control).
• You can correct the vertical and horizontal key-
stones at the same time. However, their adjust-
ment ranges are limited in such correction.
• When the keystone adjustment is carried out, the
adjustment value is indicated. Note that this value
doesn't mean a projection angle.
• The allowable range of the adjustment value in
the keystone adjustment varies depending on the
installation conditions.
• When the keystone adjustment takes effect, the
resolution decreases. In addition, stripes may
appear or straight lines may bend in images with
complicated patterns. They are not due to product
malfunctions.
• Noise may appear on the screen during the key-
stone adjustment because of the type of the video
signal being projected and the setting values of
the keystone adjustment. In such cases, set the
keystone adjustment values in the range where
the image is displayed without noise.
• When the keystone adjustment is carried out, the
image may not be displayed correctly because of
the type of input signal.
• Displayed image may be distorted during keystone
adjustment.
Adjustment feet
(rear)
Press the
,
button.
Press the
,
button.
Press the
,
(or +,
-) button.
Screen
Press the
,
(or +,
-) button.
