


EN-12
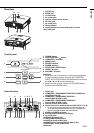
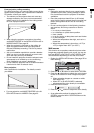
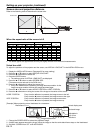
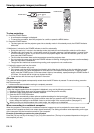
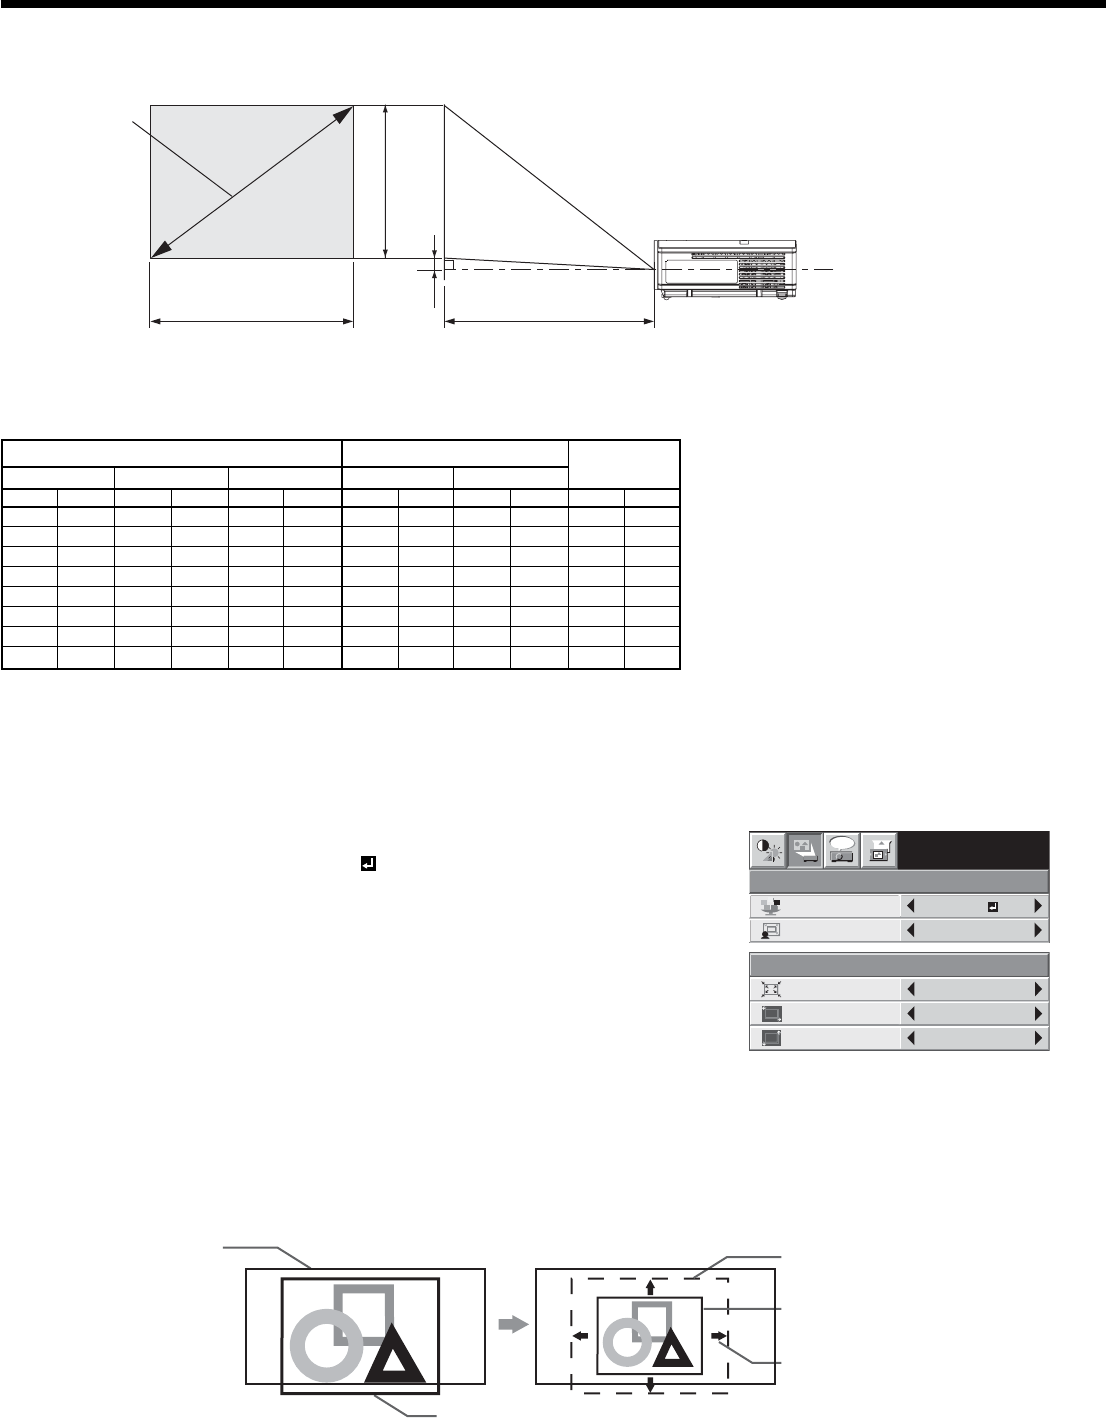
Screen size and projection distance
Refer to the following table to determine the screen size.
B
A
Hd
When the aspect ratio of the screen is 4:3
40 102 24 61 32 81 51 1.3 62 1.6 2.8 7
60 152 36 91 48 122 77 2.0 94 2.4 4.3 11
80 203 48 122 64 163 103 2.6 125 3.2 5.7 14
100 254 60 152 80 203 130 3.3 157 4.0 7.1 18
150 381 90 229 120 305 196 5.0 237 6.0 10.7 27
200 508 120 305 160 406 262 6.6 316 8.0 14.2 36
250 635 150 381 200 508 327 8.3 - - 17.8 45
300 762 180 457 240 610 393 10.0 - - 21.4 54
Center of the lens
(Height of the
projected image)
(Width of the projected image)
Screen size
Screen size
Projected distance (L)
4:3 Diagonal size Height A Width B Min. Max. Hd
inch cm inch cm inch cm inch m inch m inch cm
Projected distance (L)
• The above fi gures are approximate and may be slightly different from the actual measurements.
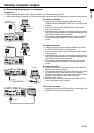
INSTALLATION
opt.
WALL SCREEN
VIRTUAL
LENS SHIFT
OFF
BEIGE
XGA60
VERT. POSITION 0
SCREEN SIZE
VIRTUAL LENS SHIFT
0
HORIZ. POSITION 0
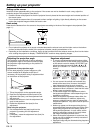
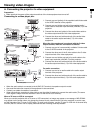
Virtual lens shift
To adjust the positions of the projector and the screen, use VIRTUAL LENS SHIFT in the INSTALLATION menu.
1. Display the INSTALLATION menu. (See page 22 for menu setting.)
2. Press the or button to select VIRTUAL LENS SHIFT.
3. Press the or button to select ON
.
4. Press the ENTER button.
• The setting menus of VIRTUAL LENS SHIFT are displayed.
5. Press the or button to select SCREEN SIZE.
(The screen can be reduced to the SVGA size.)
6. Press the or button to adjust the screen size.
• Every time the button is pressed, the image becomes smaller. As the
image becomes smaller, the lens shift range becomes larger.
7. Press the or button to select HORIZ. POSITION or VERT. POSITION.
8. Press the or button to bring the center of the image to the center of the screen.
HORIZ. POSITION Every time the button is pressed, the image moves to the left.
Every time the button is pressed, the image moves to the right.
VERT. POSITION Every time the button is pressed, the image moves down.
Every time the button is pressed, the image moves up.
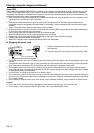
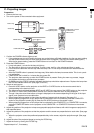
[Example] When projecting onto a blackboard in a classroom:
1. Change the SCREEN SIZE to reduce the projected image.
2. A black frame appears around the image. Move the image so that the entire black frame stays on the blackboard.
3. Set WALL SCREEN from OFF to BLACK BOARD.
Setting up your projector (continued)
Actual display area
Adjustable in
any of four
directions.
Reduced image
Blackboard
Image displacement