Basic operation
Power-on
1. Turn on the device connected to the projector first.
2. Plug the power cord in the wall outlet.
• ThePOWERindicatorlightsup.
• Ifthepowercordisunpluggedfromthewall
outlet before the projector is cooled down
completely after use, the fans may start rotating
when the power cord is plugged in next time
and the POWER button may not function. In this
case, wait for the fans to stop and press the
POWER button to light the indicator.
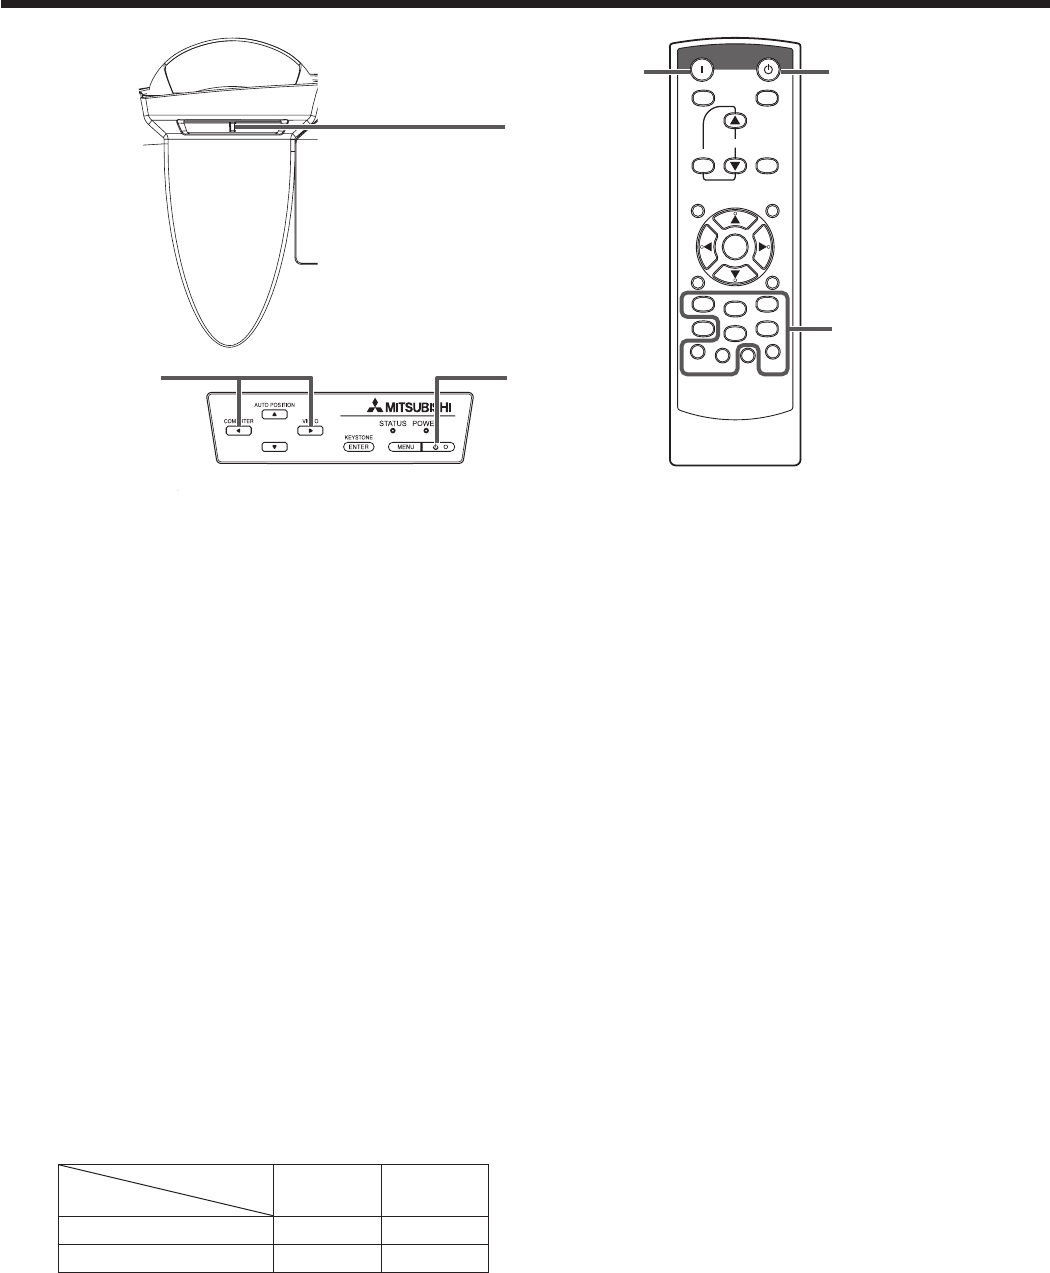
3. Press the POWER button on the control panel or
the ON button on the remote control.
• Itmaytakeaboutoneminuteforthelampto
light up.
• Thelampoccasionallyfailstolightup.Waita
few minutes and try to light the lamp again.
• AfterthePOWERbuttonispressed,theimage
may flicker before the lamp becomes stable.
This is not a product malfunction.
• RegardlessofthesettingofLampModeinthe
Installation menu, the Standard lamp mode is
activated by default whenever the projector
is turned on. The Lamp Mode is set to either
Standard or Low depending on the setting last
selected, and you cannot switch the Lamp
Mode in about one minute after the lamp is on.
Indicator
Condition
STATUS POWER
Stand-by - Red
When the lamp is on. Green Green
Important:
• Ifthelampexceptionallyturnedoffduetothe
power interruption or voltage drop, it can happen
that the lamp does not turn on even if you switch
again the power supply on. In that case, please pull
the electric cord out of the consent and put it again
in the consent about 10 minutes later.
• Donotcoverthelenswiththelenscapwhilethe
lamp is on.
• TheprojectorstartswarmingupwhenthePOWER
button is pressed. During the warm-up process,
images may appear dark and no commands are
accepted.
• Byblinkingred,theSTATUSindicatorindicatesthat
the lamp should be replaced soon. Replace the
lamp when the STATUS indicator blinks red. (See
page 52 and 56.)
• Imagesmaynotbeprojectedwithgoodqualityin
an extremely hot or cold environment. (This is not a
product malfunction.)
• Inordertoensurethesafetyincaseoftroublewith
the projector, use an electrical outlet having an
earth leakage breaker to supply the power to the
projector. If you do not have such outlet, ask your
dealer to install it.
4. Adjust the focus by turning the focus ring.
5. Choose your desired external input source using
the COMPUTER, HDMI, LAN DISP., USB DISP.,
VIEWER, VIDEO, or S-VIDEO button.
• Theinputsourceisswitchedbetween
Computer1, Computer2, HDMI, LAN Display,
USB Display, and PC Less Presentation at every
press of the COMPUTER button on the control
panel.
• TheinputsourceisswitchedbetweenVideoand
S-Video at every press of the VIDEO button on
the control panel.
• WhenpressingtheCOMPUTER(1or2),HDMI,
LAN DISP., USB DISP., VIEWER, VIDEO, or
S-VIDEO button on the remote control, the input
source switches directly as the button pressed.
• Youcannotchangetheinputsourcewhilethe
menu is being displayed.
• WhenComputerischosenasthesource,
images supplied from the computer may flicker.
Press the or button on the remote control
to reduce flicker, if it occurs.
• Toavoidpermanentlyimprintingaxedimage
onto your projector, please do not display the
same stationary images for long period.
ON
ASPECT
MAGNIFY
KEYSTONE
VOL
UP
3D
DOWN
STANDBY
MENU
FREEZE
AUTO
POSITION
AV
MUTE
ENTER
1
2
COMPUTER
VIDEO
VIEWER
UNPLUG
S-VIDEO
USB DISP.
LAN DISP.
DVI
HDMI
3
,
1, 2
5
4 FOCUS
3
1, 2
5
