


EN - 14
Basic operation
• Images may not be projected with good quality in
an extremely hot or cold environment. (This is not a
product malfunction.)
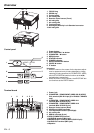
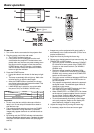
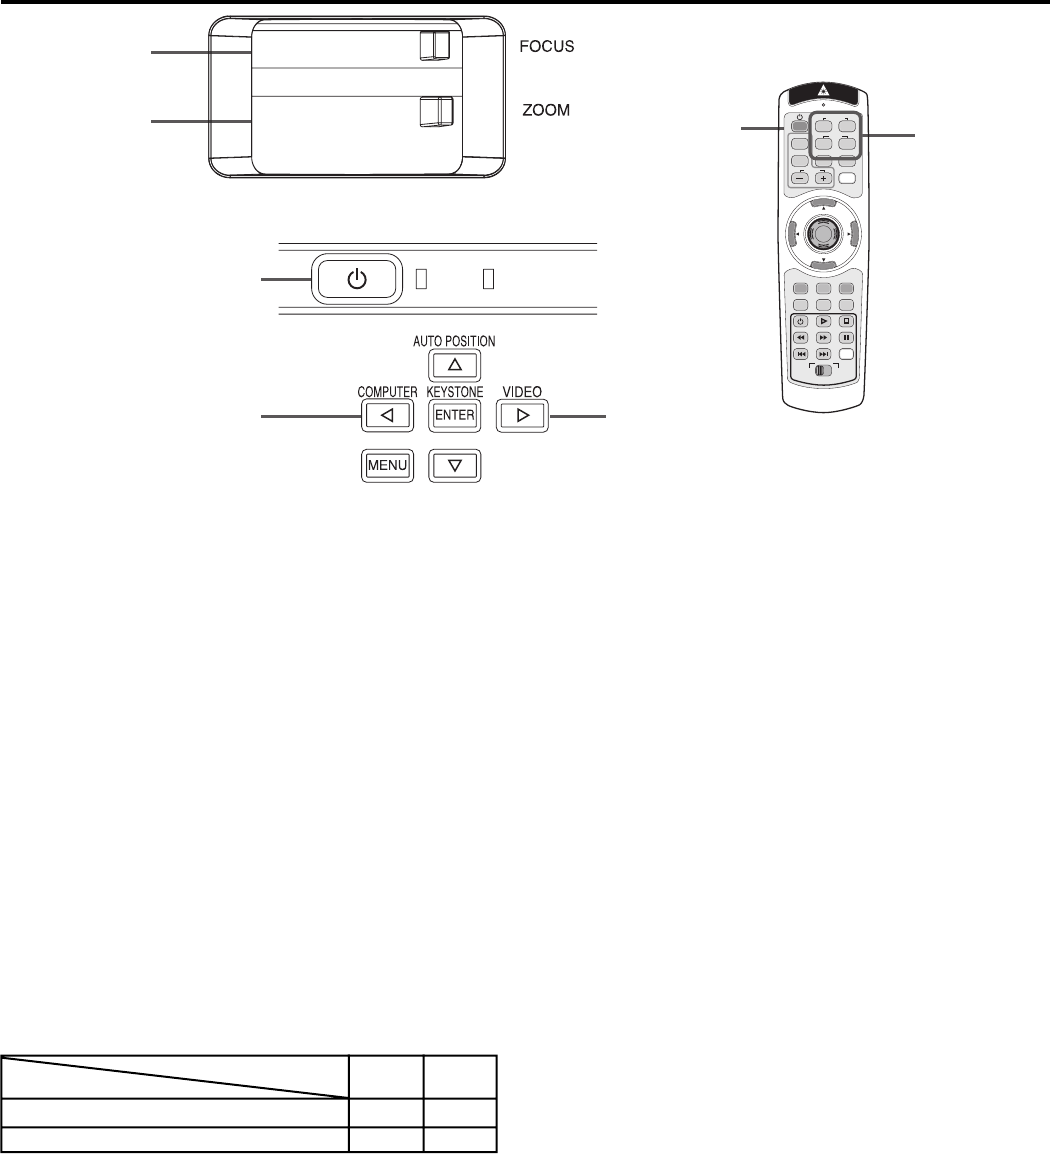
4. Adjust the focus by turning the focus ring.
5. Choose your desired external input source using the
COMPUTER or VIDEO button.
• The input source is switched between COMPUT-
ER 2 and DVI at every press of the COMPUTER
2 button on the remote control. (For XD480U /
XD450U only)
• The input source is switched between COM-
PUTER 1, COMPUTER 2 and DVI (For XD480U /
XD450U only) at every press of the COMPUTER
button on the control panel.
• The input source is switched between VIDEO and
S-VIDEO at every press of the VIDEO button on
the control panel.
• The projector automatically selects the appropri-
ate signal format. The selected signal format is
displayed on the screen.
• The COMPUTER and VIDEO buttons don't func-
tion while the menu is being displayed.
• When COMPUTER 1 or COMPUTER 2 is chosen
as the source, images supplied from the compu-
ter may fl icker. Press the or button on the
remote control to reduce fl icker, if it occurs.
• To avoid permanently imprinting a fi xed image
onto your projector, please do not display the
same stationary images for long period.
6. Adjust the image size by turning the zoom ring.
• If necessary, adjust the focus and zoom again.
Power-on
1. Turn on the device connected to the projector fi rst.
2. Plug the power cord in the wall outlet.
• The POWER indicator lights up.
• If the power cord is unplugged from the wall
outlet before the projector is cooled down com-
pletely after use, the fans may start rotating when
the power cord is plugged in next time and the
POWER button may not function. In this case,
wait for the fans to stop and press the POWER
button to light the indicator.
3. Press the POWER button.
• It may take about one minute for the lamp to light
up.
• The lamp occasionally fails to light up. Wait a few
minutes and try to light the lamp again.
• After the POWER button is pressed, the image
may fl icker before the lamp becomes stable. This
is not a product malfunction.
• LAMP MODE can't switch for one minute after
the power ON. (For XD480U / XD450U only)
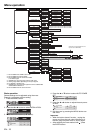
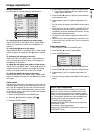
5
5
5
3,
1
,
2
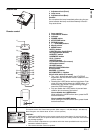
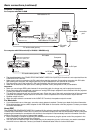
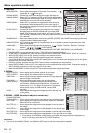
POWER STATUS
3,
1
,
2
4
6
COMPUTER
VIDEO
KEYSTONE
EXPAND
VOLUME
LASER
P in P AUTO POSITION
MENU
R-CLICK
ENTER
MUTE
STILL
16 : 9
SELECT
DVD VIDEO
1
2
1
2
MEMORY
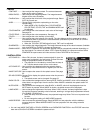
Condition
Indicator
STATUS
POWER
-
Stand-by
Red
When the lamp is on.
Green
Green
Important:
• Do not cover the lens with the lens cap while the
lamp is on. Do not strip off the aluminum sheet in-
side the lens cap.
• The projector starts warming up when the POWER
button is pressed. During the warm-up process,
images may appear dark and no commands are ac-
cepted.
• By blinking red, the STATUS indicator indicates that
the lamp should be replaced soon. Replace the lamp
when the STATUS indicator blinks red. (See page 27
and 30.)