


EN - 18
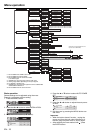
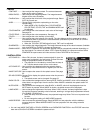
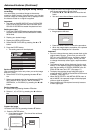
3 FEATURE
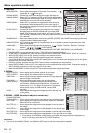
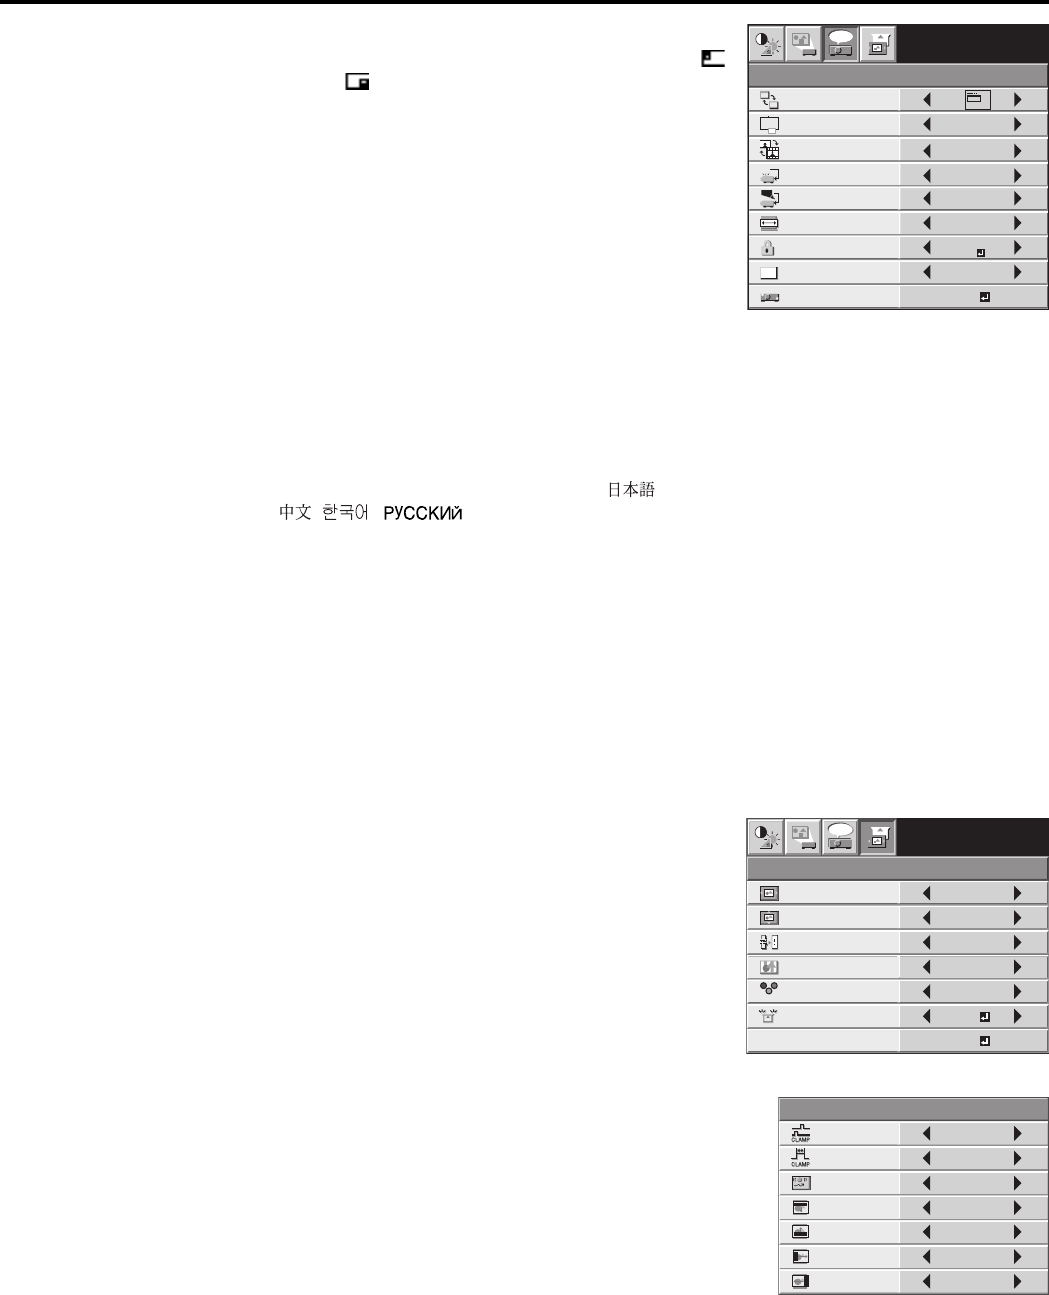
MENU POSITION
.... Use to select the position of the menu on the screen, 1.
(upper left) or 2.
(lower right).
EXPAND MODE .... Choose the mode for enlarging the image. See page 21.
CINEMA MODE .... When AUTO is selected, the fi lm mode will be automatically
activated when a fi lm source signal is inputted. When OFF is
selected, the fi lm mode will not be activated.
VIDEO SIGNAL ..... When AUTO is selected, the appropriate video format is
automatically selected depending on the input signal. If
the image isn't displayed correctly, select the desired video
format manually.
SCART INPUT ...... Choose ON when connecting the projector with a device
equipped with the SCART terminal that can output RGB
signal. SCART terminal is used mainly in Europe. Choose
OFF normally. (Available only for the input signal from the COMPUTER?COMPONENT VIDEO
IN-1 terminal.)
ANAMORPHIC ..... Select the desired position from among UPPER, CENTER, and LOWER when playing DVD discs
containing data of letterboxed images.
PASSWORD FUNCTION
.. Use to change the mode of the password lock or to enable or cancel the password lock. See
page 25 for details.
LANGUAGE .......... Use to select the language used in the menu. (
/ English / Español / Deutsch / Français /
Italiano /
/ / / PORTUGUÊS).
RESET ALL ........... Use to reset the menu settings (except IMAGE CAPTURE, PASSWORD, and LANGUAGE ).
• CINEMA MODE can be adjusted only when a TV60,480i signal is being displayed.
• SCART INPUT is available only when the input signal is from COMPUTER / COMPONENT VIDEO IN 1 terminal.
• When SCART INPUT is set to ON, nothing is output to the external monitor.
• When SCART INPUT is set to ON, normal computer signals aren't projected.
• Use a SCART-BNC (or SCART-Mini D-SUB 15P) cable (option) when connecting this projector with an AV device
equipped with the SCART terminal.
• Some AV devices equipped with the SCART terminal aren't compatible with this projector.
• When VIDEO SIGNAL is set to AUTO, the image may not be projected with correct colors. Change the setting of
VIDEO SIGNAL depending on the input signal in such cases.
• When ANAMORPHIC is set to except OFF, the keystone adjustment ranges are limited.
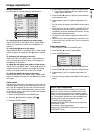
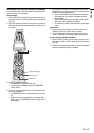
4 SIGNAL
HORIZ. POSITION
.... Use to adjust the horizontal position of the image.
VERT. POSITION
..... Use to adjust the vertical position of the image.
FINE SYNC. .......... Use to synchronize the projector with the PC input signal so
that the image is not blurred.
TRACKING ........... Use to eliminate image noise such as wide stripes.
COMPUTER INPUT .....
The projector adjusts its settings automatically when
connected to a DVD player equipped with a component
video output (Y, C
B, CR). When the projector is connected
with a device having an RGB terminal, choose RGB
manually.
HOLD .................... Use to adjust the image when fl agging occurs near the top
of the screen.
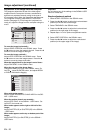
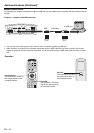
5 SIGNAL - USER (No need to adjust in normal use.)
CLAMP POSITION/
CLAMP WIDTH ..... Use to correct solid white or solid black in the projected image.
VERT.SYNC. ......... Use to adjust the image when its motion doesn't run smoothly.
Select AUTO for normal use.
SHUTTER (U) ........ Use to adjust the image when noise appears on the top part of
the image.
SHUTTER (L) ........ Use to adjust the image when noise appears on the bottom part
of the image.
SHUTTER (LS) ...... Use to adjust the image when noise appears on the left half of the image.
SHUTTER (RS) ..... Use to adjust the image when noise appears on the right half of the image.
• If any setting of the SIGNAL-USER menu is changed, the image maynot be displayed cor-
rectly. In this case, press the AUTO POSITION button.
Important:
• You can set the IMAGE, SIGNAL, and SIGNAL-USER menus only when the signal is supplied.
FEATURE
OFF
OFF
XGA60
AUTO
EXPAND
opt.
MENU POSITION
EXPAND MODE
A
A
VIDEO SIGNAL
?
ANAMORPHIC
RESET ALL
English
LANGUAGE
A
Ë
OK
SCART INPUT
DISPLAY
INPUT
PASSWORD
FUNCTION
CINEMA MODE
AUTO
1.
CLAMP
POSITION
SIGNAL-USER
0
CLAMP WIDTH 1
SHUTTER (U) 0
SHUTTER (L) 0
SHUTTER (LS) 0
SHUTTER (RS) 0
VERT. SYNC. AUTO
?
R G B
R G B
SIGNAL
HORIZ. POSITION 0
VERT. POSITION 0
TRACKING 0
COMPUTER
INPUT
RGB
FINE SYNC. 0
USER
XGA60
opt.
OK
ON
HOLD
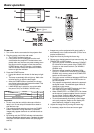
Menu operation (continued)