Chapter 2 Installation and Configuration
NI PXI-1052 User Manual 2-10 ni.com
Installing SCXI Modules
Notes Remove any rubber thread protectors from the SCXI module mounting
thumbscrews before you install the module.
Refer to the SCXI module and terminal block documentation for specific instructions
related to configuration and signal connections.
Complete the following steps to install an SCXI module.
1. Power off the PXI/SCXI chassis using the switch shown in Figure 1-1,
Front View of the PXI-1052 Chassis. To make sure that the chassis
power is off, verify that the LEDs are not lit.
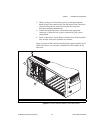
2. Insert the module into the module guide rails and slide the module
to the back of the chassis. Do not force the module into place.
3. Tighten the captive thumbscrews on the front panel of the module to
secure it in the SCXI subsystem.
Installing Optional SCXI-1360 Filler Panels
The SCXI-1360 filler panels protect the inside of the SCXI subsystem
by preventing unwanted material from entering the PXI-1052 chassis and
damaging modules or forming conductive paths that degrade performance.
Install all SCXI modules first, then install SCXI filler panels in any unused
SCXI slots.
Filler panels are the full height (4U) of an SCXI slot. Complete the
following steps to install SCXI-1360 filler panels.
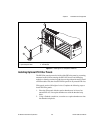
1. Place the filler panel with the captive thumbscrews in front of an
unused SCXI slot. Line up the thumbscrews with the threaded strip
holes.
2. Using a flathead screwdriver, screw the two captive thumbscrews into
the threaded strip holes.
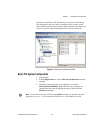
PXI System Configuration with MAX
Configuration of the PXI system is handled through Measurement &
Automation Explorer (MAX), included on the NI Driver CD packaged with
NI PXI controllers and devices. MAX creates the
pxisys.ini file, which
defines the layout and parameters of your PXI system. After installing the


