installation 4-6
Checking the Installation
Before you apply power:
• Inspect the equipment thoroughly.
• Verify that all cables are installed correctly.
• Check cable routing to make sure cables are not damaged or create a safety hazard.
• Be sure all equipment is mounted properly and securely.
Applying AC Power
The switches do not have an ON/OFF switch; the only method of applying or removing
AC power is by connecting or disconnecting the power cord. Before you connect the
power cord, select an AC outlet that is not controlled by a wall switch, which can turn
off power to the switch. After you select an appropriate outlet, use the following
procedure to apply AC power.
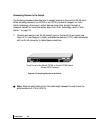
8. Connect the female end of the supplied AC power adapter cable to the power outlet
on the back of the switch
9. Connect the 3-pronged end of the AC power adapter cable to a grounded 3-pronged
AC outlet.
When you apply power:
• The green Power LED on the switch’s front panel goes on.
• The green Link LED on each connected RJ-45 port goes on.
If the green Power LED does not go on, check that the power cable is plugged in
correctly and that the power source is good. If this does not resolve the problem, refer
to Chapter 5,Troubleshooting. When power is applied, the switch conducts a power-on
self-test (POST) to verify operation. After the switch passes the POST, it is functional
and ready to pass data.


