


Making the Physical Connections 2-3
Identify the Connectors and Attach the Cables
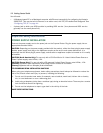
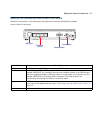
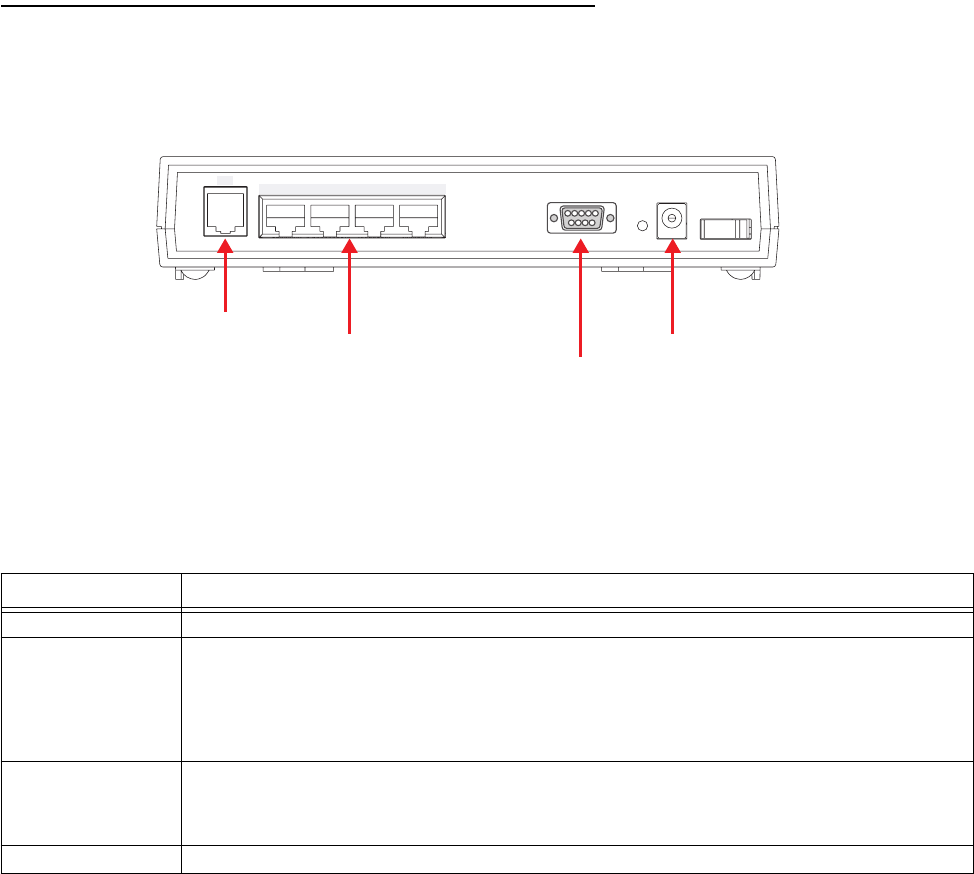
Identify the connectors on the back panel and attach the necessary Netopia Router cables.
Netopia 3366C-ENT back panel
.
Port Description
DSL port An RJ-11 jack labeled DSL to connect to your ADSL wall jack.
Ethernet ports Four RJ-45 10/100Base-T Ethernet jacks. You can use one of these to configure the
Netopia 3366C-ENT. You can either connect your computer directly to an Ethernet port
using the supplied Category 5 Ethernet cable, or connect both your computer and the
Netopia 3366C-ENT to an existing LAN environment. The Ethernet ports are
auto-sensing, eliminating the need for a crossover cable.
Console port A DB-9 console port for a direct serial connection to the console screens. You can use
this if you are an experienced user. See “Connecting a console cable to your router” on
page 5-3.
Power port A DC power adapter cable connection.
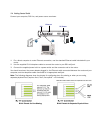
Power
Off / On
LAN
DSL
4
1
2
3
Console
DSL port
Ethernet
ports
Power port
Console port