


11
A
DVANCED
OPTION
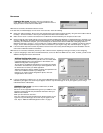
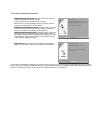
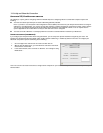
Router IP Address screen. If you selected the Advanced option in the
Easy or Advanced options screen, SmartStart asks you to choose
between entering the router’s current IP address and assigning an IP
address to the router.
If the router has already been assigned an IP address, select the first
radio button. If you do this, the Known IP Address screen appears
(shown below.)
If you want to reconfigure the router with a new IP address and subnet
mask, select the second radio button. If you do this, the New IP Address
screen appears (shown below.)
When you have done this, click Next.
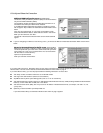
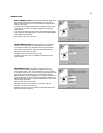
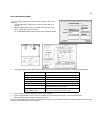
Known IP Address screen. SmartStart displays a recommended
address for the router based on the IP address of the computer.
If you know the router has an IP address different from the default
value, enter it now. Otherwise, accept the recommended address.
When you have done this, click Next.
SmartStart tests the connection to your router.
SmartStart then returns you to an Additional Configuration screen
shown on page 7.
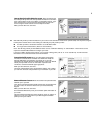
New IP Address screen. If you want to change the router’s IP
address, you enter the new IP address, the subnet mask, and the
router’s serial number in this screen. Remember, the serial number is
on the bottom of the router. It is also found in your documentation folio.
Note: Forcing a new IP address may turn off the Netopia R-series
Router’s IP address serving capabilities, if you assign an IP address and
subnet mask outside the router’s current IP address serving pool. The
Netopia R-series Router does not allow an invalid address to be served.
Use this option with caution.
When you have done this, click Next.
SmartStart forces the new IP address into the router, tests the
connection, and then resets the router.
SmartStart then returns you to the Manual or Automated Connection
Profile screen shown on page 8.