


27
4. Scanning
Nikon
LS-2000 35 mm Film Scanner User’s Guide
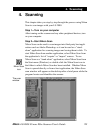
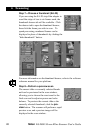
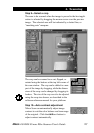
Step 9—Select a crop
The area to be scanned when the image is passed to the host appli-
cation is selected by dragging the mouse cursor over the preview
image. The selected area will be indicated by a dotted line, or
“marching ants” marquee.
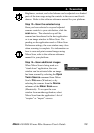
The crop can be zoomed in or out, flipped, or
rotated using the buttons at the top left corner of
the scan window. The crop can be shifted to a new
part of the image by dragging, while the dimen-
sions of the crop can be changed by dragging its
borders. The size of the crop can also be adjusted
using the crop size drawer, as described in the
software reference manual for your platform.
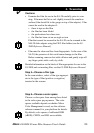
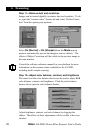
Step 10—Auto contrast adjustment
Nikon Scan can automatically adjust image
contrast to suit the color balance and tone range
of the original. Click the contrast button to
adjust contrast automatically.