Note
If the application software
has the same adjustment
item as the driver
software, do the
adjustment on the
application software, not
on the driver software. If
you adjust the same item
on both the application
software and the driver
software, the image may
be printed with
unexpected result.
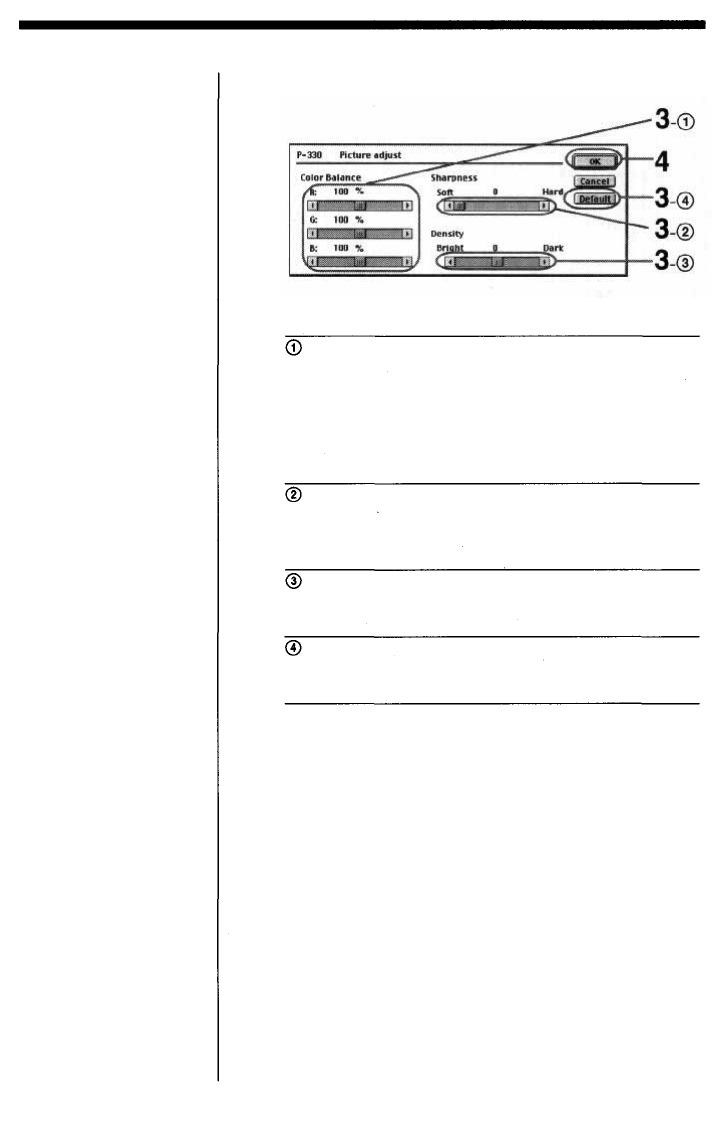
Adjust the Color Balance, Sharpness and Density.
3
If you click the [Cancel] button, the adjusting is
canceled and the previous setting is restored.
Click [OK].
The [Print] dialog appears.
4
For Macintosh
Color Balance
Changes the color balance by adjusting
the balance of red, green and blue.
Move the R/G/B sliders to adjust the
level of each color ranging from 120 %
(stronger) to 80% (weaker) by 1 %. You
can adjust the color balance also on the
[Preview] screen (page 39).
Sharpness
Adjusts the degree of emphasis of
edges in the printout. Move the slider
to adjust the sharpness by 6 steps
ranging from +5 (Hard) to 0 (Soft).
Move the slider to adjust the density by
15 steps ranging from +7 (Dark) to -7
(Bright).
Density
Default
Resets the above items to the default
setting. Color balance becomes 100 %,
sharpness and density become 0.
37
