


9. Programmable Features
66
9.6 Scan features
Feature/Code Selection
Setting the scan mode for
Push Scan
{#}{4}{9}{3}
{1} “VIEWER” (default): The scanned image will be displayed in the [Multi-
Function Viewer] window.
{2} “FILE”: The scanned image will be saved as a file.
{3} “EMAIL”: The scanned image will be saved for email attachment.
{4} “OCR”: The scanned image will be displayed in the OCR window.
{5} “EMAIL ADDRESS”: The scanned image will be sent as an attachment
without using email software.
{6} “FTP SERVER”: The scanned image will be sent to the pre-programmed
folder on the FTP server.
Note:
L Following selections will be displayed only when the server setting is
programmed through the web browser interface in advance.
– “EMAIL ADDRESS” will be displayed when the email server setting is
programmed (page 66).
– “FTP SERVER” will be displayed when the FTP server setting is
programmed (page 67).
Holding the previous
scanning parameter for Push
Scan
{#}{4}{9}{4}
{0} “DISABLED” (default): Deactivates this feature.
{1} “ENABLED”: The unit will hold the previous scan settings for each mode of
push scan.
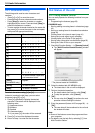
Setting the information for
scan to email address (LAN
connection only)
L This feature can be
programmed only through
the web browser interface.
When you send scanned files as email attachments directly from this unit, you
need to program the email server and SMTP server settings beforehand.
Consult your service provider or network administrator for details.
1. Start Multi-Function Station.
2. [Utilities] i [Configuration Web Page] i [Device Configuration]
3. Type “root” as the user name, then enter the password (feature #155 on
page 56). i [OK]
4. Select the [SCAN FEATURE] tab.
5. Click [Edit] next to [EMAIL SERVER].
6. Enter the email server and SMTP server information. i [Submit]
7. Close the web browser.
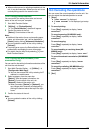
Registering the scan to email
address destinations (LAN
connection only)
L This feature can be
programmed only through
the web browser interface.
When you send scanned files as email attachments directly from this unit, you
can register email destinations (up to 300 destinations) for the unit through the
web browser interface in advance.
1. Start Multi-Function Station.
2. [Utilities] i [Configuration Web Page] i [Device Configuration]
3. Type “root” as the user name, then enter the password (feature #155 on
page 56). i [OK]
4. Select the [SCAN FEATURE] tab.
5. Click [Edit] next to [SEND USER].
6. Click [Edit] next to the desired scan to email user.
7. Enter the name and email address.
L Select the station key number from the drop-down list if necessary (KX-
MB3020 only).
8. [Submit]
9. Close the web browser.