


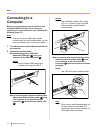
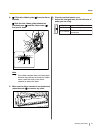

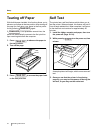
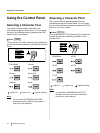
3. Raise the top cover (A).
This is done by inserting the side pins of the top
cover into the slots in the upper cabinet.
A
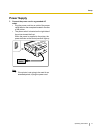
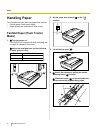
4. Raise the paper support (A).
A
Note
• lf the extension plate is already installed
(Page 22), it does not need to be removed.
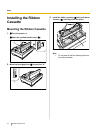
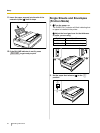
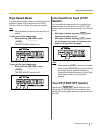
5. A Separate the paper guides to the approximate
width of your paper or envelope.
Note
• To predetermine your left most print
position, move the left paper guide until it
clicks into place.
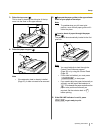
B Insert a sheet of paper through the paper
guides (A).
The paper will be automatically loaded to the first
print line.
B
A
A
Note
• You can disable Auto load through the
Control Panel Software program
(Page 25) or by using the Control Panel
(Page 33).
• If Auto load is disabled, you must press
LOAD/PARK
to load paper.
• If you need to align the paper horizontally or
vertically, set the paper feed selector to
" ". This releases the paper and allows the
paper to be positioned manually as
required. Set the selector back to " "
before printing.
6. If the ON LINE indicator is not lit, press
ON LINE
to get ready to print.
Operating Instructions 23
Setup