


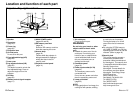
20-ENGLISH ENGLISH-21
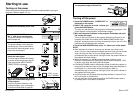
Preparation
Setting-up
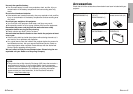
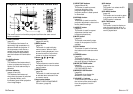
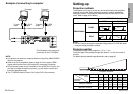
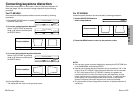
Projection methods
The projector can be set up so that any one of the following four projection
methods can be used. Select whichever projection method matches the
setting-up method. (The projection method can be set from the OPTION
menu. Refer to page 40 for details.)
FRONT/REAR
FRONT
REAR
(Factory default setting)
NOTE:
BYou will need to purchase the separate ceiling bracket (ET-PKE300) when
using the ceiling installation method.
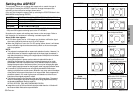
Projector position
The projection range of this projector is 1.2 m – 7.4 m.
The lower edge of the projected image falls about 0.1 m from the center of
the lens.
For details about projected image distances, refer to page 65.
DESK/CEILING
DESK CEILING
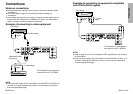
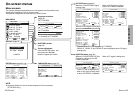
NOTE:
BIt is better to shut down the computer before turning off the MAIN POWER
switch of the projector.
BRefer to the list of compatible signals on page 61 for the types of RGB
signals which can be input to the projector by connecting a computer.
BOnly one audio system circuit is available for the AUDIO IN L-R jacks, so if
you wish to change the audio input source, you will need to remove and
insert the appropriate plugs.
BThe PT-AE200U does not have a DVI-D input (DVI-D IN) connector.
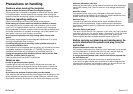
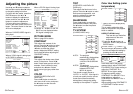
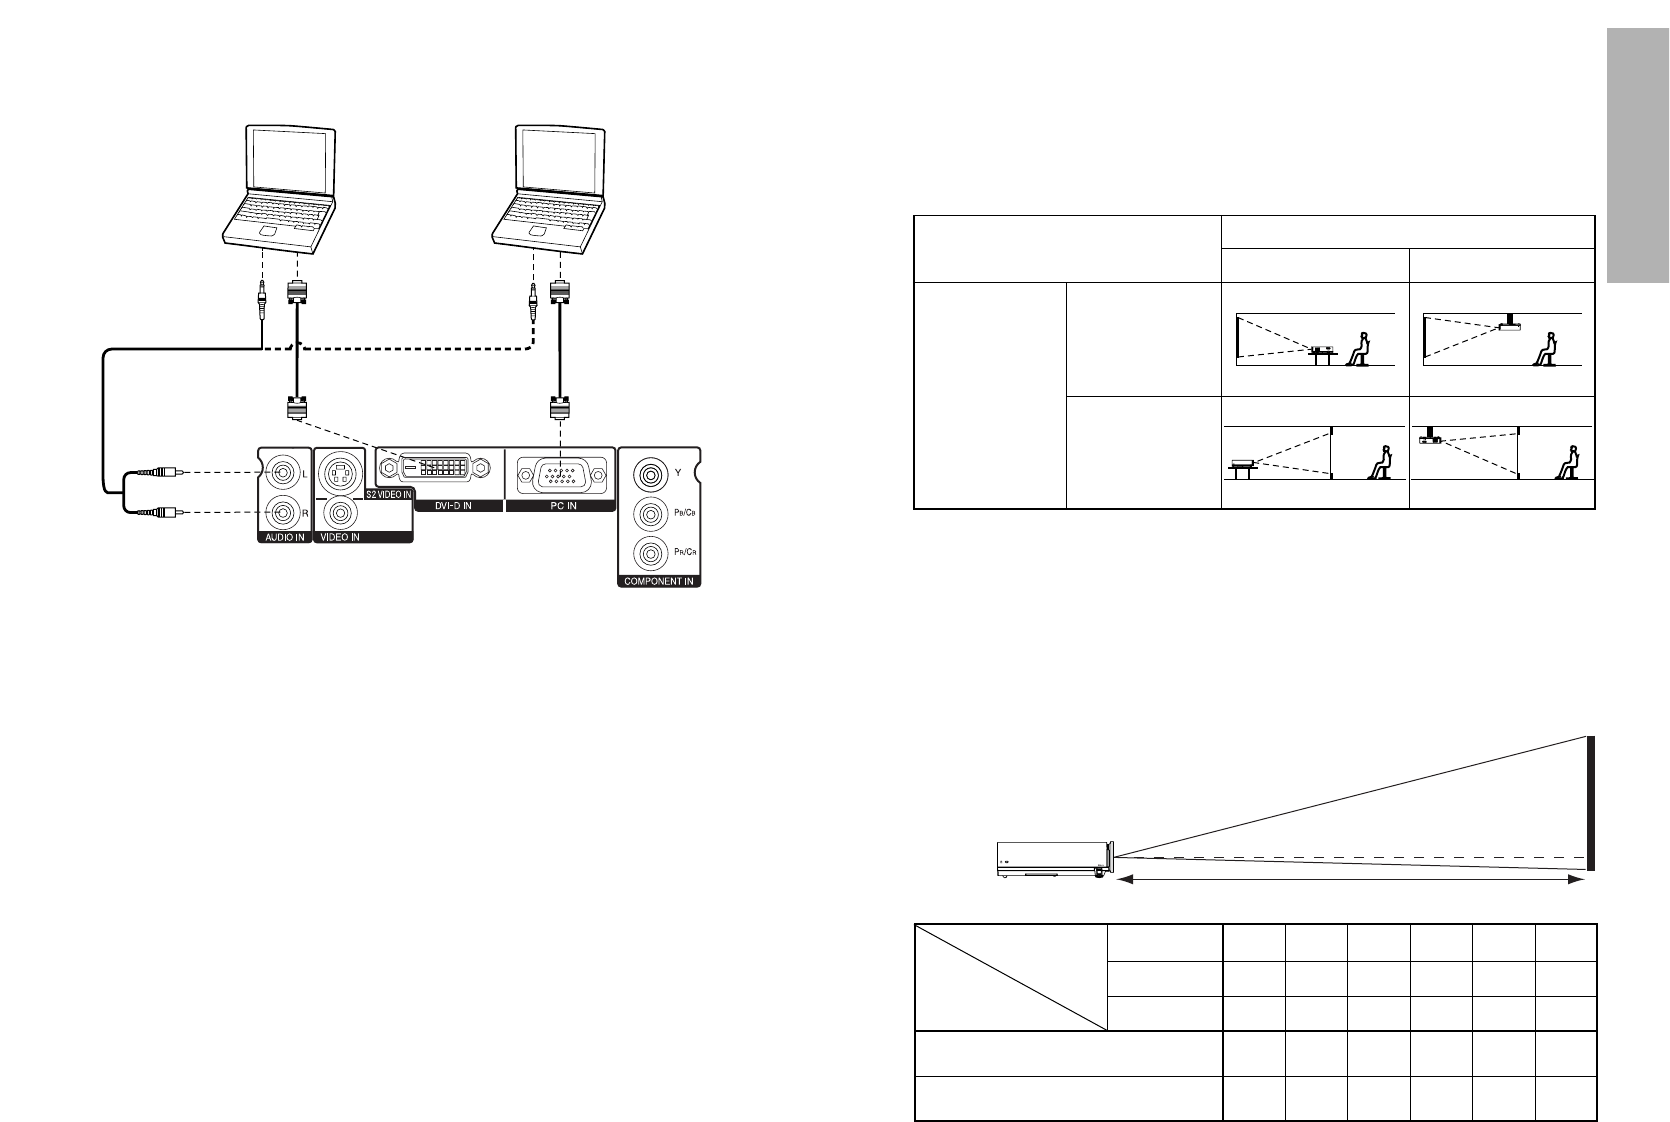
Example of connecting to computer
Computer Computer
To RGB
output
To audio
output
To audio
output
To DVI-D
output
* This illustration is an example of
connection for the PT-AE300U.
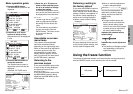
Projection Distance
Projection
Distance
0.9 m
(2´11˝)
1.2 m
(3´11˝)
1.4 m
(4´7˝)
1.9 m
(6´2˝)
2.2 m
(7´2˝)
2.5 m
(8´2˝)
2.9 m
(9´6˝)
3.1 m
(10´2˝)
3.7 m
(12´1˝)
4.7 m
(15´5˝)
5.6 m
(18´4˝)
6.2 m
(20´4˝)
7.4 m
(24´3˝)
Minimum Distance
Maximum Distance
Screen Size
(16:9)
0.5 m
(1´7˝)
1.3 m
(4´3˝)
0.8 m
(2´7˝)
1.8 m
(5´10˝)
1.0 m
(3´3˝)
2.2 m
(7´2˝)
1.3 m
(4´3˝)
3.3 m
(10´9˝)
1.9 m
(6´2˝)
4.4 m
(14´5˝)
2.5 m
(8´2˝)
40˝ 60˝ 80˝ 100˝ 150˝
200˝
Diagonal length
Height
Width