


Replacement
64
- ENGLISH
Maintenance
J
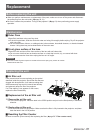
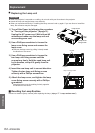
Replacing the Lamp unit
CAUTION:
When the projector is mounted on a ceiling, do not work with your face close to the projector.
z
Attach the lamp unit and the lamp cover securely.
z
When you experience difculty in installing the lamp, remove it and try again. If you use force to install the
z
lamp, the connector may be damaged.
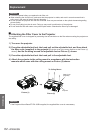
Turn off the Power by following the procedure 1 )
in “Turning off the projector” (
Æ
page 31).
Unplug the AC power cord. Wait at least 45
minutes and make sure the lamp unit and
surroundings are cool.
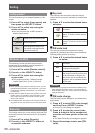
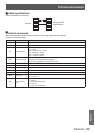
Use a Phillips screwdriver to loosen the 2 )
lamp cover xing screw and remove the
lamp cover.
Remove the lamp cover by pulling it slowly toward
z
the direction of the arrow.
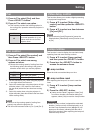
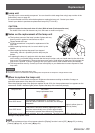
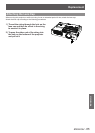
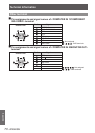
Use a Phillips screwdriver to loosen the 3 )
two lamp unit xing screws until the
screws turn freely. Hold the used lamp unit
by its handles, and pull it gently from the
projector.
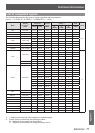
Insert the new lamp unit in correct direction. 4 )
Tighten the two lamp unit xing screws
securely with a Phillips screwdriver.
Attach the lamp cover, and tighten the lamp 5 )
cover xing screw securely with a Phillips
screwdriver.
Attach the lamp cover by pushing it slowly opposite
z
the direction of the arrow.
Resetting the Lamp Runtime
J
Be sure to reset the [Lamp runtime] after replacing the lamp. (
Æ
page 57 "
Lamp runtime reset
")
Lamp cover
fixing screw
Lamp cover
Handles
Lamp unit
Lamp unit fixing screws