COMSPHERE –48 Vdc Central Office Power Unit
2-16 May 1998 3000-A2-GB41-40
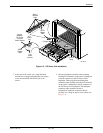
3. Secure a nylon cable tie in the handle mounting
holes.
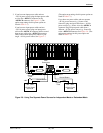
4. Place the power module in the card guides and
slide the power module to the rear of the carrier.
When sliding the left power module into the CO
Power Unit, hold the SDCP ribbon cable to the
left of the power module. Then, tighten the two
captive screws on the front of the power module
(see Figure 2-3).
5. If the CO Power Unit has an optional second
power module, repeat Steps 2 through 4 for the
right power module and proceed to the next step.
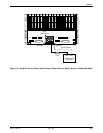
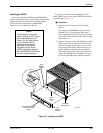
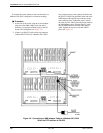
6. Attach the SDCP ribbon cable to the back of the
SDCP as shown in Figure 2-8.
7. Mount the SDCP to the front of the carrier by
securing the two top captive screws of the SDCP
into the two bottom screw holes of the carrier.
Connecting the Alarm Contacts to a CO
Alarm System
The CO Power Unit monitors the power output levels
and the fan’s low-speed sensor for proper operation of the
power module. Both major (power failure) and minor (fan
failure) alarms can be sent to a CO alarm system. A major
alarm is sent to a CO alarm system if a power failure
occurs in either the –48V input or low voltage output. A
minor alarm is sent to a CO alarm system if a fan failure
occurs or if the fan speed drops below 1900 rpm. After the
CO Power unit is installed, you can connect the power
unit to a CO alarm system.
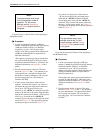
NOTE
The CO alarm cables and
mating connectors are
customer-supplied components.
To connect the CO Power Unit to a CO alarm system:
" Procedure
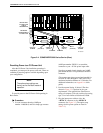
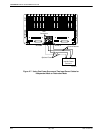
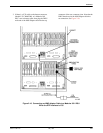
1. At the rear of the carrier, locate the cable
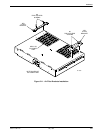
connectors labeled Alarm A and Alarm B (see
Figure 2-4).
2. To send alarm signals from the left power module
to a CO alarm system, plug a customer-supplied
mating connector (AMP part number 103957-4)
and cable into the Alarm A connector. To send
alarm signals from the right power module, if the
CO Power Unit has two power modules, to a CO
alarm system, plug a customer-supplied mating
connector (AMP part number 103957-4) and cable
into the Alarm B connector.
For pin assignments of the Alarm A and Alarm B
connectors, see Appendix A of this guide.


