


Hotwire 6210, 6211, and 6381 User’s Guide
4.5.2 Changing the Modem’s IP address
To can change the modem’s IP address:
1. From the Home screen, click Setup.
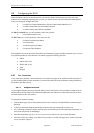
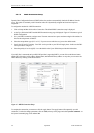
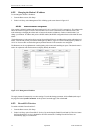
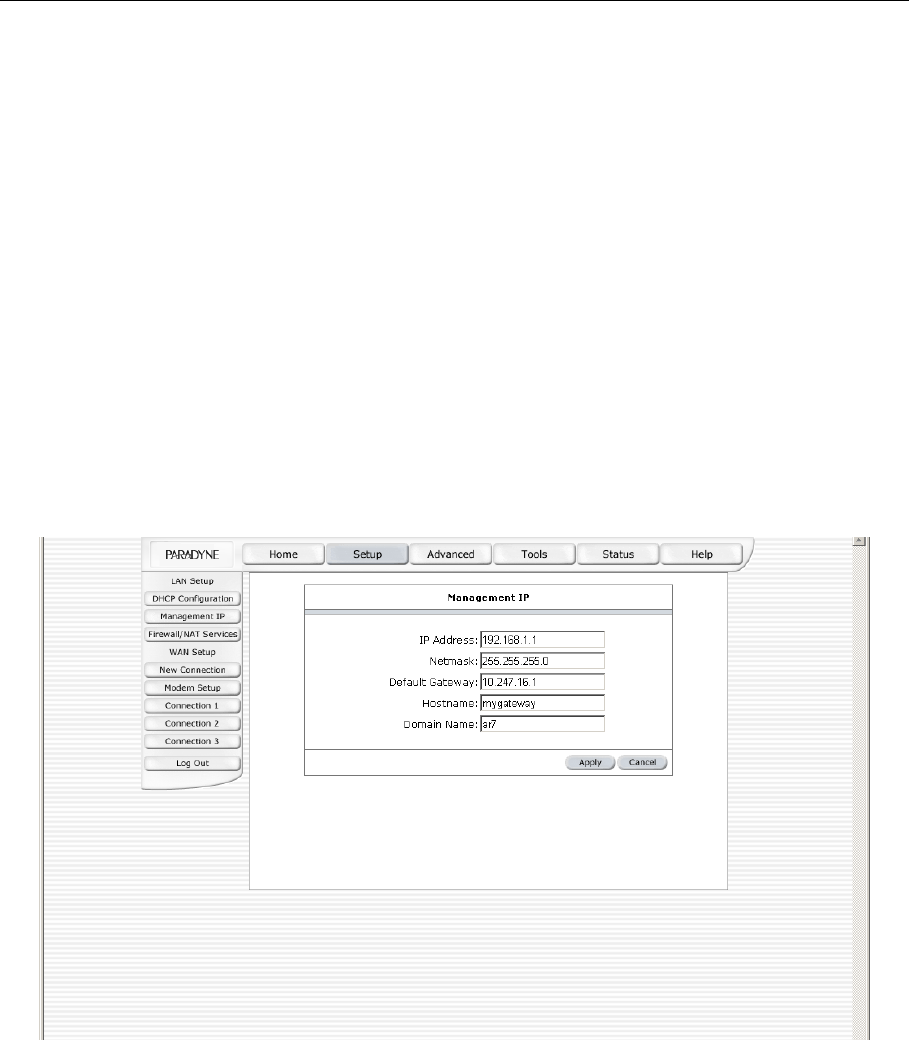
2. Under LAN Setup, select Management. This will bring up the screen shown in Figure 4-12.
4.5.2.1
Static IP address assignment
Your modem’s default IP address and subnet mask are 192.168.1.1 and 255.255.255.0, respectively. This subnet mask
allows the modem to support 254 users. Since the DHCP server issues a maximum of 255 addresses, there is not
much advantage to changing the subnet mask to increase the number of addresses. Further, remember that if you
change your modems’ IP address and you have DHCP enabled, the DHCP configuration must reside within the same
subnet.
The default gateway is the routing device used to forward all traffic that is not addressed to a station within the local
subnet. Your ISP will provide you with the default gateway address. Figure 4-12 shows a default gateway address of
10.247.16.1 because this was the default gateway defined when the CLIP connection was configured.
The Hostname can be any alphanumeric word beginning with a letter and containing no spaces. The domain name is
used to in conjunction with the host name to uniquely identify the modem.
Figure 4-12. Management IP Address
The Apply button will temporarily save these settings. To make the change permanent, click on Tools (at the top of
the page) and select System Commands. At the System Commands page, click on Save All.
4.5.3 Firewall/NAT Services
To enable or disable Firewall and NAT:
1. From the Home screen, click Setup.
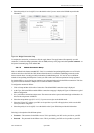
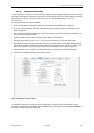
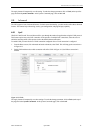
2. Under LAN Setup, select Firewall/NAT Services. By unselecting the Enable Firewall and NAT Services button
the firewall and NAT services is disabled for all WAN connections. Enabling Firewall NAT does not
automatically apply it to connections.
32 April 2004 6210-A2-GB21-00