Setting Up NetScout Manager Plus for FrameSaver Devices
10-8
9820-A2-GB20-20
June 2000
Adding SLV Alarms Using a Template
Once DLCIs have been discovered, SLV alarms should be configured and
assigned to each DLCI. OpenLane provides a template for configuring alarms.
DLCI alarms can be configured manually, but using the Paradyne alarm defaults
template greatly reduces configuration time.
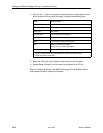
The following alarms are configured for each DLCI included in the Paradyne MIB:
— Frames Sent (SLVFramesSnt) — Rx DLCI Utilization (SLVrxDLCIUtil)
— Tx CIR Utilization (SLVTxCIRUtil) — Frames Sent Above CIR
(SLVFramesTxAbvCIR)
— Tx DLCI Utilization (SLVTxDLCIUtil) — Average Latency (AverageLatency)
— Frames Received (SLVFramesRec) — Current Latency (CurrentLatency)
These alarms and current values can be found in $NSHOME/usr/slvtemplate.fct,
which is used as a starting point for loading new alarms. This file can be copied
and edited so the alarm threshold values match service level agreement values.
The copied .fct file can then be used to replicate alarm threshold values for all
DLCIs on the unit using the eztrap utility. All .fct files must be in $NSHOME/usr.
To configure alarms manually, see
Adding SLV Alarms Manually
.
NOTE:
Perl must be installed in your system to use the eztrap utility in the procedure
below. If you have an NT system, please install Perl before proceeding.
" Procedure
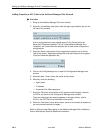
1. Open a terminal window and go to $NSHOME/usr.
2. Type eztrap -i
filename
.fct -o
agentname
.fct
agentname
and press Enter to
run the eztrap utility to create alarm threshold values across all DLCIs for the
copied .fct file.
The message eztrap done appears when the .fct file is transferred.
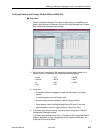
3. From the NetScout Manager Plus main window, with the FrameRelay and
Admin radio buttons still selected, click on the Config Manager icon to open
the Configuration Manager main window.
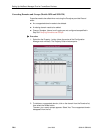
4. Edit any alarm values that need to be changed.
5. Select the Install button (down the center of the Configuration Manager
main window) to load alarms for the unit. This may take some time, so
please be patient.
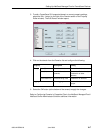
See
Editing Alarms
if any default settings need to be changed.


