Getting started
6
Connect the other end of the supplied line cord to the ADSL filter
then connect the ADSL filter to the telephone socket
• light will turn on
Then click on Continue
• A progress bar screen will be displayed
Select your country and Internet Service Provider (ISP) using the
information provided by your ISP
Note
If your ISP is not in the default list, please select "Other".
Click on Continue
• A progress bar screen will be displayed, your parameters will be saved
and you will be connected to Internet
• Once the installation completed, the following screen will be displayed
Note
This screen is the Philips support site. It is a live Internet page, subject
to change. The screen displayed may differ from the one shown.
Click on Menu if you want to go back to the menu screen
Tip
Your WiFi network is running but not secured.
Click on Set Encryption
• Your WiFi network will be secured automatically
• You will not be able to choose your encryption key nor your network
name (SSID)
Note
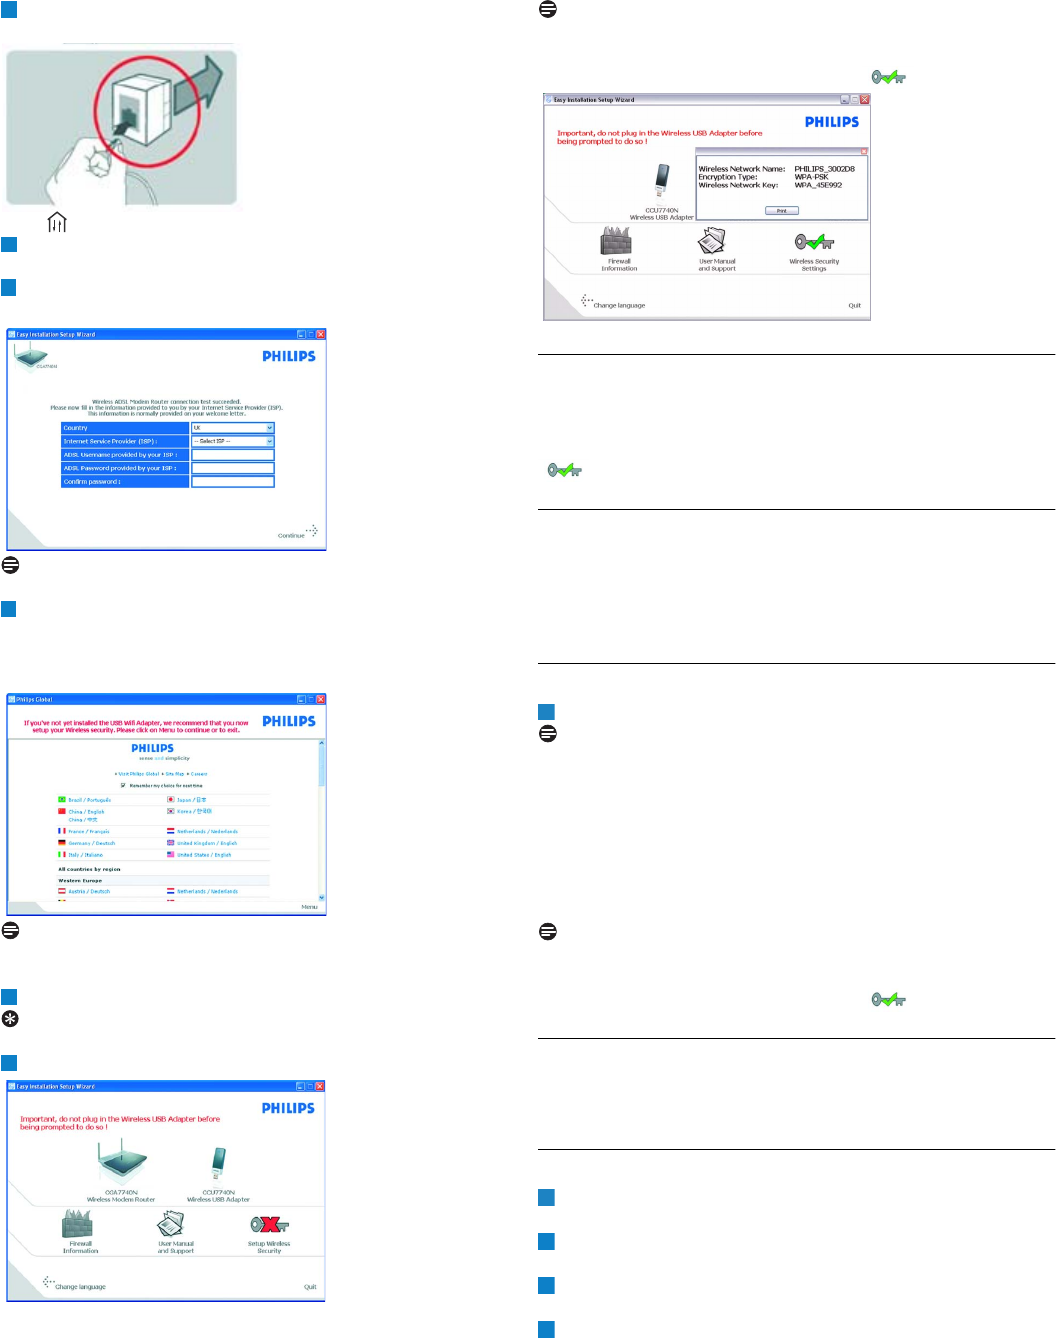
At any time you can retrieve your wireless security settings using your
installation CD ROM on the computer where you installed your
gateway and by clicking on the security icon of the menu page.
3.3 Install a WiFi device
If you want to install a WiFi device you have to retrieve your wireless
security settings using your installation CD ROM on the computer
where you installed your gateway and by clicking on the security icon
of the menu page.
3.3.1 Install a Wireless USB adapter CCU7740N
If you have bought the starter kit CKA7740N, the Wireless USB
adapter CCU7740N is part of the box content. In that case you just
have to insert the installation CD ROM, provided with your
CKA7740N, and follow the instructions on the screen.
3.3.2 Install another WiFi device
Refer to the manual of the other WiFi device
Note
If you have previously secured your network (see 3.2 step 13) through
the easy installation, the name of your network (SSID) will be
"PHILIPS_xxxxxx".
If not secured previously through the easy installation, the SSID will be
"philips_install".
In case you have given another name to your network, bear in mind that
this name will be displayed instead of the "PHILIPS_xxxxxx" or
"philips_install".
Note
At any time you can retrieve your wireless security settings using your
installation CD ROM on the computer where you installed your
gateway and by clicking on the security icon of the menu page.
3.4 Install another WPS device
You can install another WPS device on your network in any of the three
following ways :
3.4.1 via the PIN method
Check that your Wireless router and that the other WPS device are
connected and ON
On your Internet Browser, enter http://192.168.2.1 in the address
field and click on GO to access the webpages
Click on the WIRELESS tab on the left side of the page and select
PIN to open the corresponding subpage
Enter the PIN from the client device (the other WPS device) and
click START PIN
• The other WPS device is installed on your network


