


124
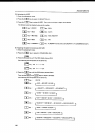
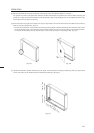
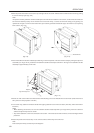
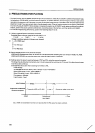
2. When all panels have been removed, the top and right side of the screen will become free. Remove the screen by pulling
it out from the top right. (Fig. 5-9.)
Note:
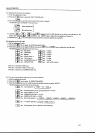
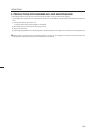
The panel is fixed by adhesive double coated tape at the left side and bottom of the screen, but the lenticular sheet can
be removed relatively easily. As the Fresnel lens is secured firmly, it cannot be removed easily just by pulling out
upwards to the right. To remove the Fresnel lens, pull it slowly upwards towards the right, and remove it as if opening
it like a door. (Fig. 5-10)
OPERATIONS
Fresnel lens
(Fig. 5-10)
(Fig. 5-9)
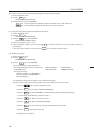
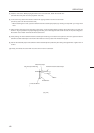
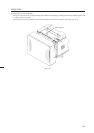
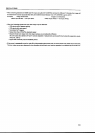
3. Peel off the adhesive double coated tape remaining on the fixed panels. This can be done easily by rolling the tape into
a ball with your finger. Then, paste with new adhesive double coated tape as shown in the figure. Use adhesive double
coated tape approximately 5 mm wide.
4. Mount the new screen. Mount the Fresnel lens while making sure not to mistake the front and back. (That which has a
shiny surface is the projection unit side.)
5. In the same way, attach the lenticular sheet while paying attention to the front and back. (The shiny side is the Fresnel
lens side.)
Notes
• When attaching the screens, rub over the adhesive double coated tape with your finger firmly from the outside to
adhere the tape firmly onto the screen.
• Pay careful attention to the front and back of the screen. If mounted at the sides reversed, unnatural images will be
produced.
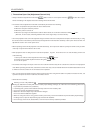
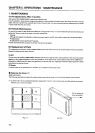
6. Attach the panels removed at step 1 in the reverse order as when they were removed.
Note
Insert each panel firmly so that they fit the stoppers.
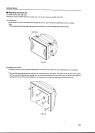
Space
Approximately 4 cm
Approximately 10 cm
(Fig. 5-11)
Approximately 10 cm