


57
INSTALLATION AND ASSEMBLY
7'
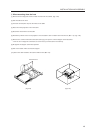
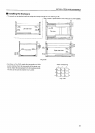
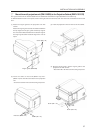
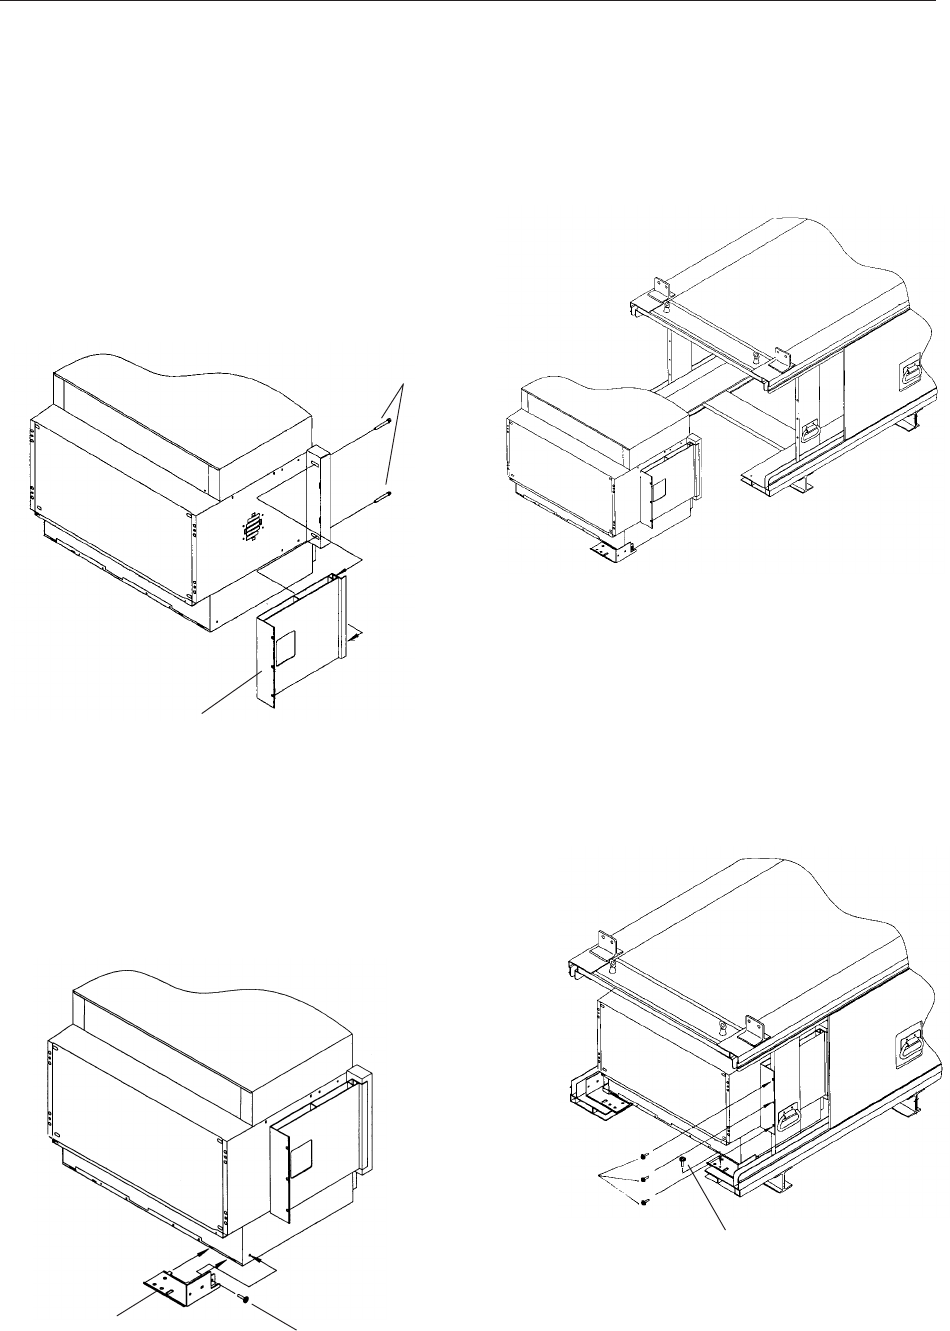
Mount the multi-projection unit (RM-V2400N) to the Projection Cabinet (RMF-V4011CR)
The figure shows how the left side attachment is assembled. Assemble the right attachment in the same way.
To differentiate the R and L of the parts, those on the right side of the screen as seen from the front are R and those on the left
are L.
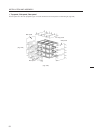
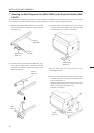
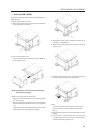
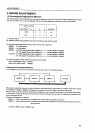
(3) Insert the projection unit from the rear of the cabinet.
(4) Attach fixtures R and L and the engine guide to the
projection unit with screws.
* Secure the M6 × 20 with a screw-locking compound.
Screw (M6 × 20)
Screw (M5 × 12)
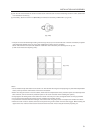
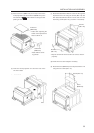
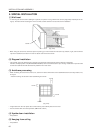
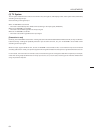
(2) Insert the claws of fixtures R (BNG1173) and L
(BNG1174) into the slits at the back of the projection
unit.
* Secure the screws with a screw-locking compound.
Fixtures L (BNG1174)
Screw (M5 × 12)
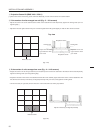
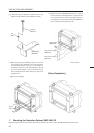
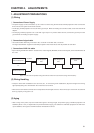
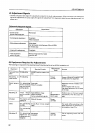
(1) Attach the engine guide to the projection unit with
screws.
Attach the engine guide so that the distance between
the top edge of the engine guide and the top edge of
the unit and the distance between the bottom edge of
the engine guide and the bottom edge of the unit are
equal.
Screw (M6 × 50)
Engine guide (BND1099)