


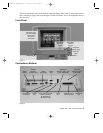
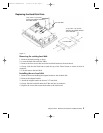
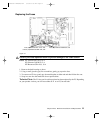

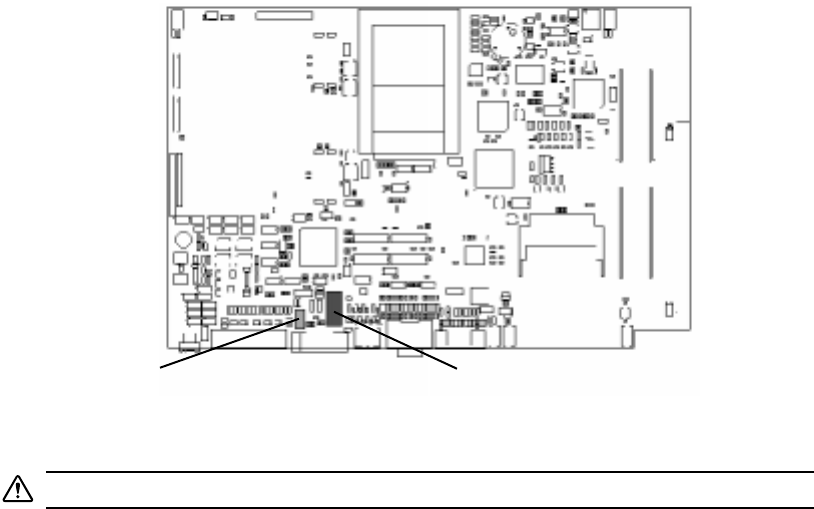
Replacing the Fuses
Figure 13
Use only the fuses specified below to prevent damage to the Clean Screen.
Fuses: F1 Schurter 001.1014, 10 A
F2 Schurter 3402.0012, 2 A
F5 Bussman GDA-10A, 10 A
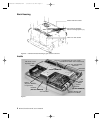
1. Remove the back housing as above.
2. Using a small (jeweler type) flat screwdriver, gently pry up on the fuse.
3. To remove an F2 fuse, gently pry the metal bracket at either end and then lift the fuse out.
4. Snap in a new fuse that meets the above specifications.
Technical Note: The F1 fuse used in earlier products has been replaced by the F5. Depending
on your product version, you will have either an F1 or an F5, but not both.
Chapter Three: Hardware Installation and Replacement 11
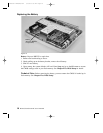
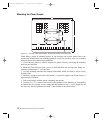
Fuse (F1) Schurter 001.1014, 10A; Fuse (F2) Schurter 3402.0012, 2A
or Fuse (F5) Bussman GDA-10A, 10A
CS Manual LAYOUT#1787 3/9/98 5:33 PM Page 11