


PLANET IP PBX user’s manual
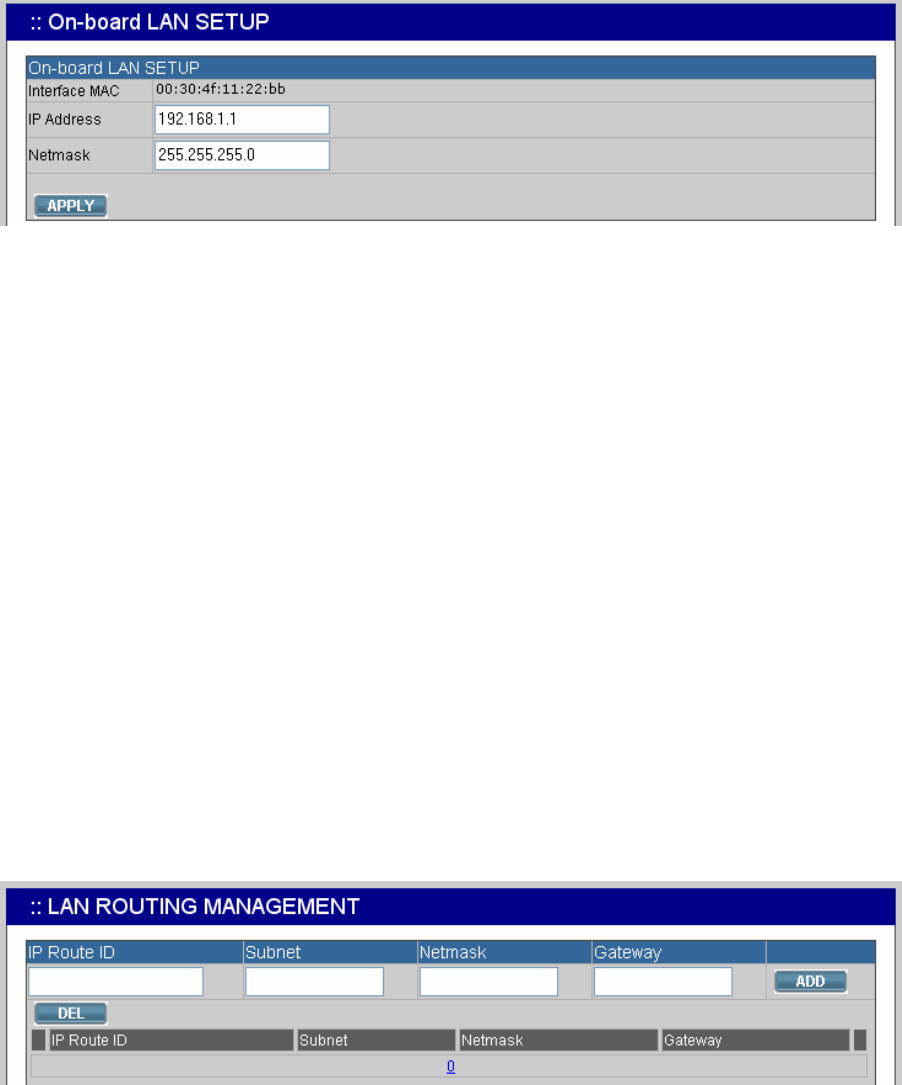
2.4 On-board LAN Setup
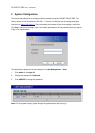
The On-board LAN Setup page allows administrator to configure LAN network interface for PLANET
IP PBX.
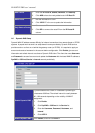
1. Select System -> On-board LAN Setup to see the current settings of LAN network interface.
2. Enter a new IP address and network mask.
3. Click “APPLY” to change the settings.
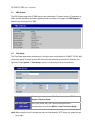
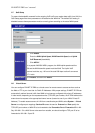
Note: By default PLANET IP PBX grants IP addresses to LAN devices via DHCP, and translates
those addresses into its WAN IP address for access beyond the LAN subnet. As a result,
modifying the system LAN IP subnet must also change DHCP pool and LAN routing (if any)
accordingly. After configuration, go to Service -> IP PBX Service, and click Restart to active
the changes.
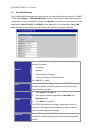
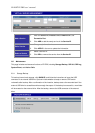
2.5 LAN Routing
To enable static routing among LAN subnets, enter network information and the IP address of the
corresponding gateway in the IP PBX’s LAN. It is important to assure that the given gateway IP
address sits in the IP PBX’s LAN. Each subnet requires an entry even multiple subnets share the
same gateway, unless masking does the same. Examples are adding IP Route IDs net1 and net2 with
parameters 192.168.128.0/255.255.255.0, 192.168.129.0/255.255.255.0, shared gateway
192.168.1.254 respectively. Or, IP Route ID net1n2 with 192.168.128.0/255.255.254.0 and gateway
192.168.1.254 would do the same. Added routes enable routing immediately after clicking ADD.
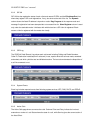
However, the IP PBX Service needs to be restarted to regard calls from designated LAN subnets as
LAN traffic. Go to Service -> IP PBX Service, and click Restart to regard calls as LAN traffic.