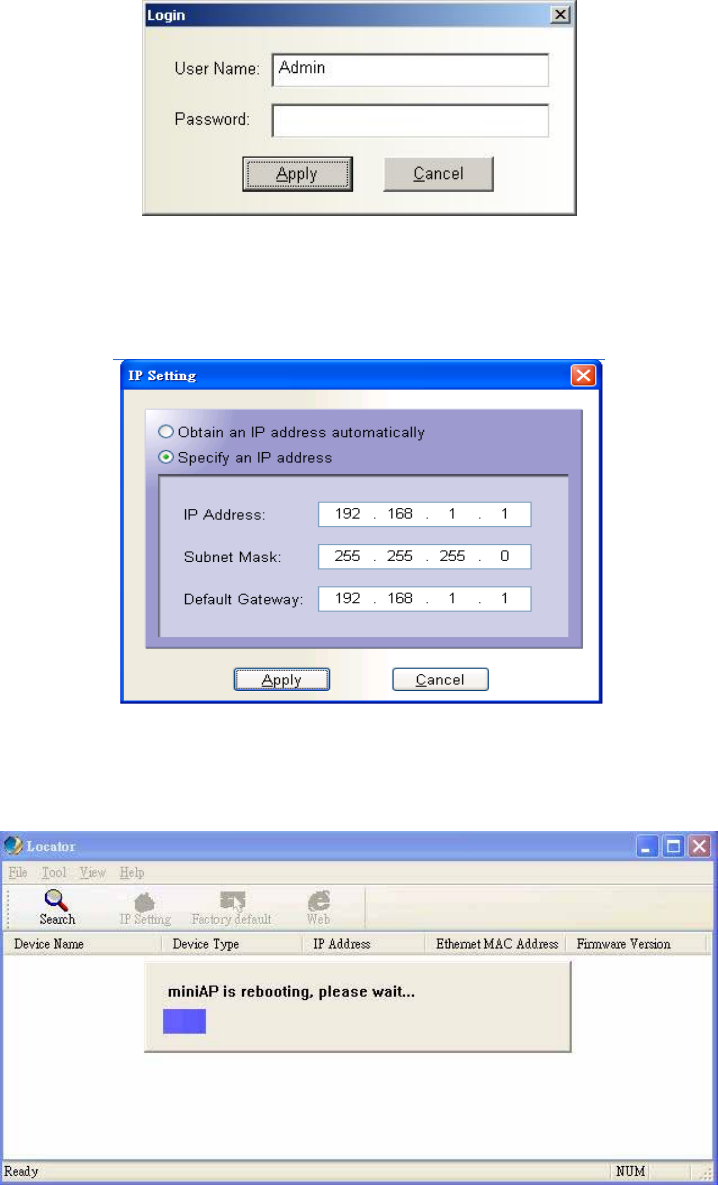
4. After type in correct user name and password, the “IP Setting” box appears. Here you can
choose to obtain IP from a DHCP server or specify IP address manually. If your environment or
ISP provide DHCP server, you can choose the first option. Otherwise, you need to manually
setup IP address. Click on “Apply” button and WAP-6100 will reboot immediately. After the
reboot completes, the WAP-6100 is operating with new settings.
5. To restore WAP-6100 back to factory default values, click on the “Factory default” icon. This
operation requires you to login the WAP-6100 first. Please input correct user name and password
into the fields. The WAP-6100 will reboot immediately. After the reboot completes, the WAP-6100 is
operating with default settings.
6. Click on the “Web” icon, the Internet Explorer will be executed and connect to the web interface
of WAP-6100. Please refer to the next chapter for how to manage WAP-6100 via web.
