


5
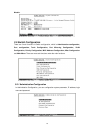
Ø Flow control: none
After finished the setting, click OK.
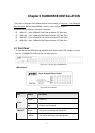
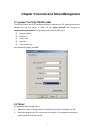
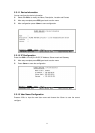
2.2 Rear Panel
The Rear Panel of the switch is indicates an AC 3 pronged power socket and Ventilation fan.
This switch will work with AC in the range 100-240V AC, 50-60Hz.
Figure 2-5 Rear Panel of WSW-2401
Power Receptacle
For the compatibility with electric service in most of areas, WSW-2401’s power supply can
automatically adjust line power in the range 100-240V AC, 50-60Hz.
Power On
Connect the power cord to the power socket on the Rear Panel of the Switch. The other side of
power cord connects to the power outlet.
2.3 Hardware installation
WSW-2401 can be placed on desktop or mounted on rock. If this switch is used as standalone
standard, the user can immediately use most of the features simply by attaching the cables
and turning the power on.
Desktop installation
For desktop installation, make sure the desk is flat and clean. Plug all the network cables and
the power cord then the system is ready.
Note: Do not obstruct any vents at the sides of the case and keep water off.
Rock-mount installation
WSW-2401 can be mounted in a standard 19-inch rack. The following steps is teaching user
how to Rack Mounting the Switch in the 19-inch rack:
1. Disconnect all cables from the switch.
2. Place the unit the right way up on a hard, flat surface with the front facing toward
you.
3. Locate a mounting bracket over the mounting holes on one side of the unit.
4. Insert the screws and fully tighten with a suitable screwdriver.
5. Repeat the two previous steps for the other side of the unit.
6. Insert the unit into the 19" rack and secure with suitable screws (not provided).
7. Reconnect all cables.