


E-17
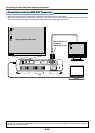
Connecting Personal Computers and Video Equipment
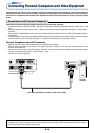
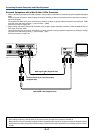
Personal Computers with a Mini D-Sub 15-Pin Connector
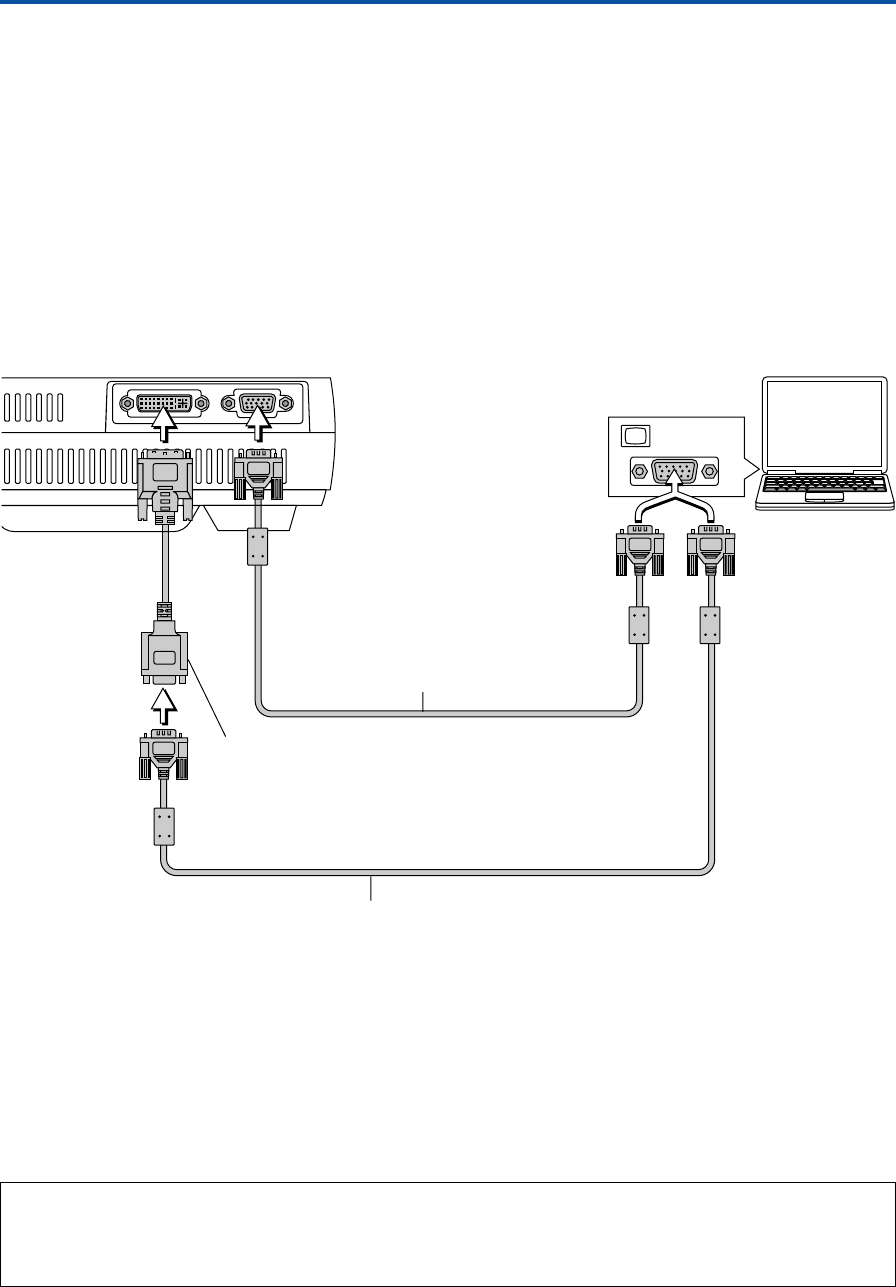
• When connections are made to the RGB connector of this projector, make these connections using the supplied RGB signal
cable.
Please orient the connector to mate properly when before inserting it, then turn the screw knobs to secure the connector to
that of the projector.
The projector has been set to "Auto" at the factory; however, if it does not project, please change the input setting to "RGB"
using the menu sequence of [Setup] → [Input Format] → [RGB].
See "Input Format" on Page E-49.
• When making connections with the DVI connector of the projector, please make the connection via the supplied DVI/mini D-
Sub 15-pin conversion cable.
The projector has been set to "Auto" at the factory; however, if it does not project, please change the input setting to "Analog"
using the menu sequence of [Setup] → [Input Format] → [DVI].
See "Input Format" on Page E-49.
RGBDVI
MONITOR OUT
RGB signal cable (Supplied item)
Personal computer
DVI/mini D-Sub 15-pin conversion cable
(Supplied item)
RGB signal cable (Supplied item)
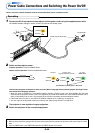
Note:
* Before making connections, check the power of the projector and the equipment to be connected is switched off.
* When projection will be with a notebook computer connected, knowledge will be required for the cable connection and notebook computer
startup procedure as well as the operation that follows startup. Please consult the instruction manual of your notebook computer or the on-
line help.