Jiva SL & Jiva EL (TP5700/5800) USER’S MANUAL 3 - 6
both sides to secure the cable cover on the main unit. Adjust the tilt angle of the main
unit for best viewing effect in the application.
CAUTION: On doing any insertion or extraction of any connector, please always
hold the connector head itself instead of pulling on the cable wire.
Failure to do this could damage the cable and jack that is considered
as an artificial destruction and is not covered by the warranty.
WALL MOUNTING
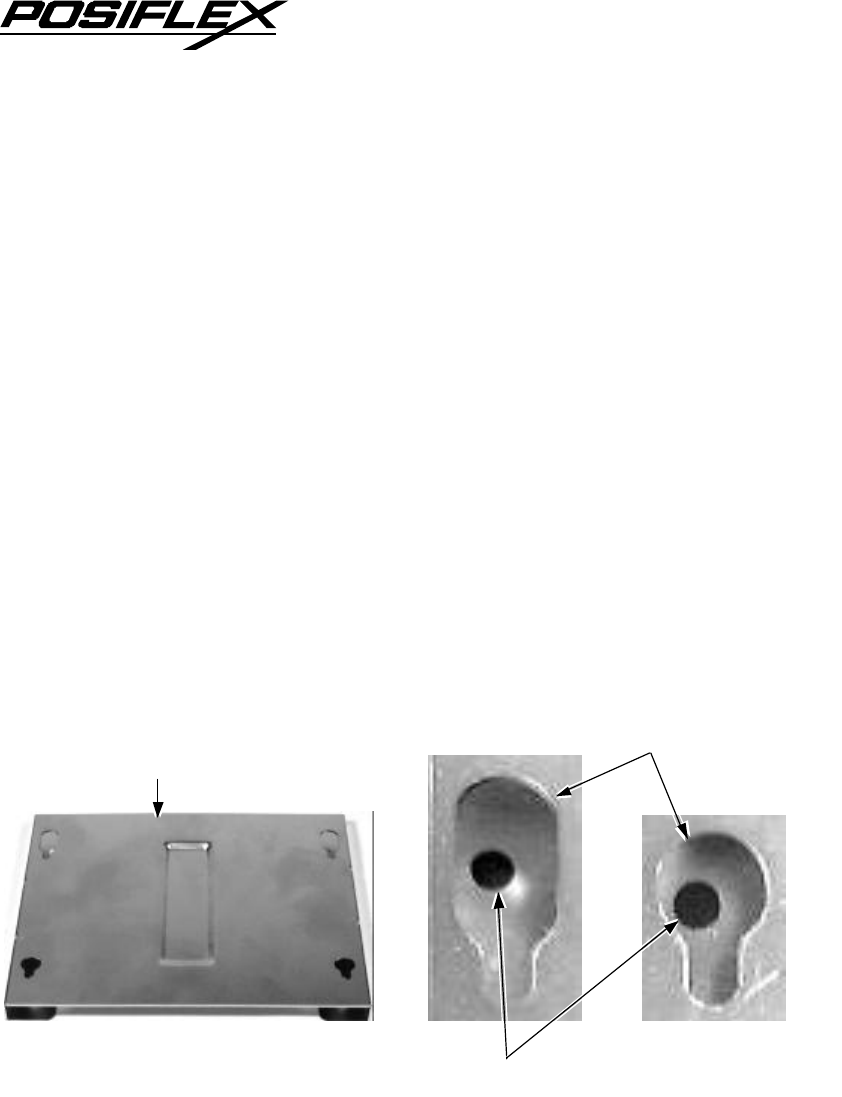
The major part in the wall mounting kit is a bracket as shown in the picture.
Screw the bracket against the wall for mounting the Jiva SL & Jiva EL (TP5700/5800)
series in the direction that the wider parts of the matching holes are at the top as
shown in the picture. Align the four matching pegs on the back of the main unit with
the four matching holes in the bracket to hold the main unit in the similar manner as
installing the main unit onto the stand assembly. The stand assembly is not engaged in
wall mount operation.
LOCATION FOR INSTALLATION
As the stand assembly is not involved in wall mount installation, the space
required for wall mount application will take only the main unit into consideration. So
the space required is 375 mm in width and 315 mm in height.
For desk top/counter application, the adjustable stand assembly requires a base
of 270 mm deep and 260 mm wide. However, please take also the main unit into
Wall Mount Bracket
Matching Holes
Screw At Screw Holes Through Matching Holes


