


EST150
Page 10 Visit the Premier Mounts website at http://www.premiermounts.com Installation Instructions
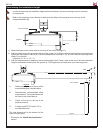
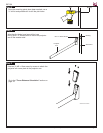
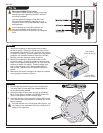
Step 2
1) Attach the mounting legs to the projector using the
corresponding mounting hardware.
Do not tighten the mounting hardware at this time.
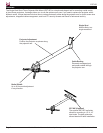
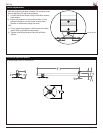
Multiple Mounting Point Installation
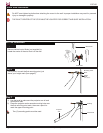
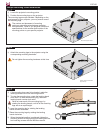
Step 1
1) Locate the projector’s mounting points.
2) Position the mounting legs on the projector.
The mounting legs are pre-installed. Depending on the
requirements of your projector, you may remove one of
the mounting legs.
The number and placement of mounting
points on projectors varies between projector
manufacturers. Refer to you projector’s technical
specications for the number and location of the
mounting points on your specic projector.
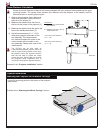
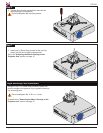
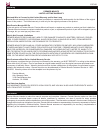
Step 3
1) If the mounting legs need to be leveled, rotate the
leveling barrels to level the mounting bracket.
2) To raise the mounting legs, rotate the leveling barrel
clock-wise. To lower the mounting leg, rotate the
leveling barrel counter clock-wise.
Raise or lower each of the mounting legs, by
rotating the leveling barrels, until all of the mounting
legs are at an equal height.
• Lower the mounting leg by rotating the leveling
barrel counter-clockwise.
• Raise the mounting legs by rotating the leveling
barrel clockwise.
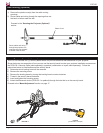
3) When the desired position is achieved, tighten the
mounting screws to the projector and then tighten the
hex head leg screws with the M5 Allen wrench.
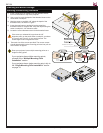
Screws shown for illustration
purposes only.
Mount carriage not shown.