


EST150
Page 6 Visit the Premier Mounts website at http://www.premiermounts.com Installation Instructions
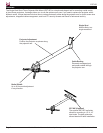
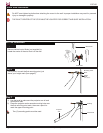
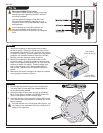
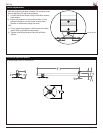
THE EXACT CENTER OF THE STUD MUST BE LOCATED FOR CORRECT AND SAFE INSTALLATION.
Use an electronic stud nder (not supplied) to
locate the center of the stud that is in the wall.
Wood Stud
Stud nder
Height
Mark
(from page 5)
Wood Stud
Marking
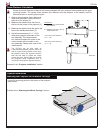
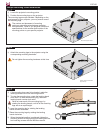
Projector
Arm
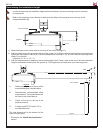
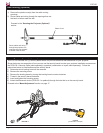
Do NOT over-tighten lag bolts when attaching the mount to the wall. Improper installation may result in personal
injury or damage to property.
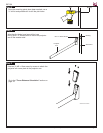
Wood Stud Installation
Mounting Point
Mark
Step 1
Step 2
Use a pencil to mark the rst mounting point, just
above your height mark (from page 5).
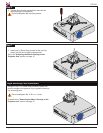
Step 3
1) Use the level to make sure the projector arm is level
from side to side.
2) Place the projector arm’s second mounting hole over
the rst mounting point mark, then use a pencil to
mark the upper mounting point.
Two (2) mounting points must be used.
EST150 Installation