


EST150
Installation Instructions Visit the Premier Mounts website at http://www.premiermounts.com Page 9
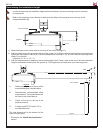
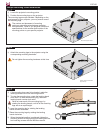
Attaching the Mount Carriage
Selecting the Mounting Hardware
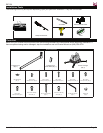
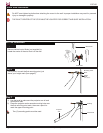
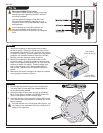
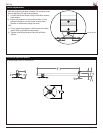
1) Insert a small straw or toothpick into the threaded inserts
found on the bottom or top of the projector.
2) Use a pencil to mark the depth of the threaded insert on the
small straw or toothpick.
3) Mark the straw or toothpick 1/8” above the depth of the
threaded insert, as shown in Figure 1.
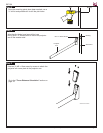
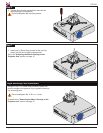
4) Insert the small straw or toothpick into the remaining
threaded inserts to compare and verify their depth using the
straw or toothpick’s 1/8” allowance mark.
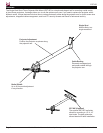
5) Locate the correct diameter screw for the threaded insert.
If the screw you selected is longer than the 1/8”
allowance mark on the small straw or toothpick, as shown
in Figure 2 and Figure 3, do not use this screw. The
screw length must not bypass the mark.
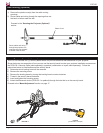
6) Test each size of the screws provided. The correct screws
should thread easily into the mounting point and not pull out
when tension is applied.
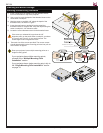
Does your projector have multiple mounting points or a
single mounting point?
If your projector has multiple mounting points,
proceed to the “Multiple Mounting Point
Installation” section.
If your projector has a single mounting point, skip to
the “Single Mounting Point Installation” section
on page 14.
Small Straw or Toothpick
Small Straw
or Toothpick
Small Straw
or Toothpick
Marking the 1/8”
Allowance
Depth Plus 1/8” Allowance
Mark
Depth Plus 1/8” Allowance
Mark