


18 Creating Discs
Section 3: Creating Discs
There are two main components to creating discs, printing and
recording. The Discus software will aid you in designing the
printing for your discs. Discribe 5.2 will allow you to master
the data and automate the recording and printing of your
discs. This section will describe both of these applications in
detail.
A. USING DISCUS
The Discus software included with your Publisher is a great
tool for creating professional looking discs. You can use Discus'
custom backgrounds and easy to use text features to quickly
design a label, or import labels designed in other software
packages. The On-Line Help section will provide complete
instructions on all the features in this package. The following is
a tutorial on creating a basic disc design.
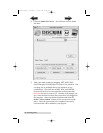
1. Launch Discus.
2. Click New Project.
3. Select a Label type (i.e. Disc, Hockey Rink Business Card,
Rectangular Business Card, or 80mm CD).
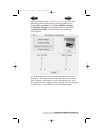
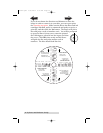
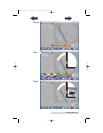
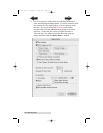
4. You will now see your template and 4 Tabs with different
tools to help you design your disc. The first tab, Canvas,
will allow you to select from one of the built in
backgrounds.
The Up and Down Arrows in the lower left corner of the
screen will allow you to browse through the available
backgrounds. Simply click on a background will apply it to
your template. You also have some tools to invert (or flip),
rotate, and adjust brightness of your background.
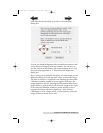
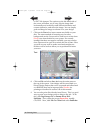
5. Once you are satisfied with your background, click on the
Paint tab to "paint" any lines, circles or shapes on your
disc. You can select from borders or filled shapes, and pick
your desired color at the bottom of the screen. If you make
a mistake, click Undo.
6. Click on the Photo tab if you would like to add a photo or
graphic to your design. Click New to import a graphic or
photo. You will see a browser to allow you to search for
your desired graphic. Discus will import BMP, GIF, JPEG,
510877.qxd 1/13/2004 4:33 PM Page 18
TOC
INDEX