


Chapter 2 Running Auto Calibrate
36
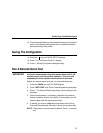
Running Auto Calibrate
Due to manufacturing differences in media and ribbon, the media
sensor may have difficulty distinguishing between the label and the
liner (gap).
To ensure proper operation, you must now run Auto Calibrate:
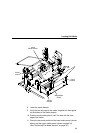
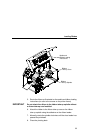
1. Power on the printer by pressing the power switch. (For the
location of the power switch and various panel keys, refer to
“Controls And Indicators” on page 22.)
2. Press the key until QUICK SETUP displays.
NOTE: For a complete description of the QUICK SETUP menu,
see page 38.
3. If necessary, press ↓ and ↵ at the same time to unlock the
↵ key.
4. Press ↑ or ↓
until Gap/Mark Sensor / Disable* displays.
5. Press
+ or – until Gap displays.
6. Press
↵. An asterisk (*) displays next to Gap.
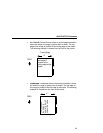
7. Press ↓
until Auto Calibrate/Run Calibrate displays.
8. Press
↵. Media advances until it can accurately detect the label
length indicators and then stops at the top-of-form position. The
sensed distance value then displays for one second.
9. Auto Calibrate is successful when the sensed distance value
correctly matches that of the installed media. For the Gap
option, the sensed distance value is the physical length of one
label plus the length of one gap.
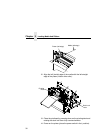
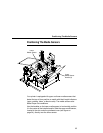
10. If GAP NOT DETECTED or PAPER OUT displays, check the
horizontal position of the media sensors (see “Positioning The
Media Sensors” on page 35), press PAUSE, and run Auto
Calibrate again.
11. Press the PAUSE key to take the printer offline.
12. Press the FEED key several times. Each time you press FEED,
the media should advance one label length and stop.
.
.
.