


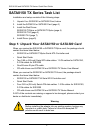

SATAII150 and SATA300 TX Series Quick Start Guide
12
7. From the Windows XP Setup screen, press the Enter. Setup will now load all
device files and then continue the Windows XP installation.
Existing Installation
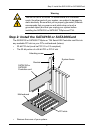
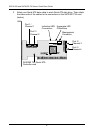
After installing the SATAII150 or SATA300 Serial ATA Controller card and
rebooting your system, Windows XP setup will show a “Found New Hardware”
dialog box.
1. Insert the driver diskette into the A:\ drive.
2. Choose Install the software automatically and press the Enter key.
3. Choose Windows Promise SATAII150/SATA300TX2plus [or TX4] (tm) IDE
Controller from the list that appears on screen, and then press the Enter
key.
4. If using a driver that has not been digitally signed by Microsoft, you will be
asked if you want to continue the installation. Click Continue anyway.
5. When the New Hardware Wizard has finished installing the SATAII150 or
SATA300 driver, click Finish.
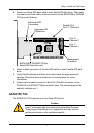
Confirm Installation
1. Right-click on the My Computer icon and select Manage from the popup
menu.
2. From the left panel, select Device Manager.
3. Click the “+” in front of SCSI and RAID controllers. “Windows Promise
SATAII150/SATA300TX2plus [or TX4] (tm) IDE Controller” should appear.
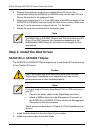
Windows 2000
New Installation
The following details the installation of the SATAII150 or SATA300 Serial ATA
Controller drivers while installing Windows 2000.
1. Start the installation:
• Floppy Install: Boot the computer with the Windows 2000 installation
diskettes.
• CD-ROM Install: Boot from the CD-ROM. Press F6 after the message
“Press F6 if you need to install third party SCSI or RAID driver” appears.
2. When the Windows 2000 Setup window is generated, press S to specify an
Additional Device(s).
3. Insert the driver diskette into drive A: and press Enter.
4. Choose Windows Promise SATAII150/SATA300TX2plus [or TX4] (tm) IDE
Controller from the list that appears on screen then press Enter.