


Fine-Tuning the Image
32 ProjectionLink User & Installation Guide
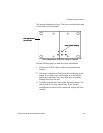
Fine-Tuning the Image
Depending on your Proxima projector, the length of CAT-5
cable used, or the type of computer signal being displayed,
you may need to optimize the image quality by adjusting the
gain and color settings on the receiver (PL-300R). We recom-
mend you make these adjustments after you have all the
cables and connections made at the transmitter and receiver.
However, make these fine-tuning adjustments prior to install-
ing the receiver in its final location.
There are two simple adjustments that will ensure the best
possible image quality. The first of these is the gain adjust-
ment. The gain control is located on the side of the receiver.
To make the gain adjustments, use the following steps:
1. Connect the CAT-5 cable to both the transmitter and
receiver.
2. Connect a computer to ProjectionLink and display a test
image. If you don’t have a test image go to
www.Proxima.com to download one. Any white grid on a
black background will work well.
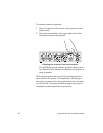
3. Use a screwdriver or other small, narrow tool to turn the
gain control on the side of the receiver to adjust the image.
Adjust the dial clockwise for increasing cable lengths, and
counterclockwise for decreasing cable lengths.
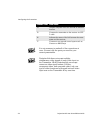
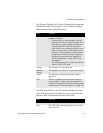
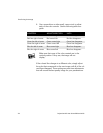
Blinking Green The link is intact, but there is no active input
source selected on the transmitter.
Green ProjectionLink is functioning correctly.
Blinking Green
and Red
The TV video signal is unstable. This will not
affect ProjectionLink’s image quality.
LED STATUS