CHAPTER 3: INSTALLATION AND CONFIGURATION 19
Step 4: Connect the Equipment
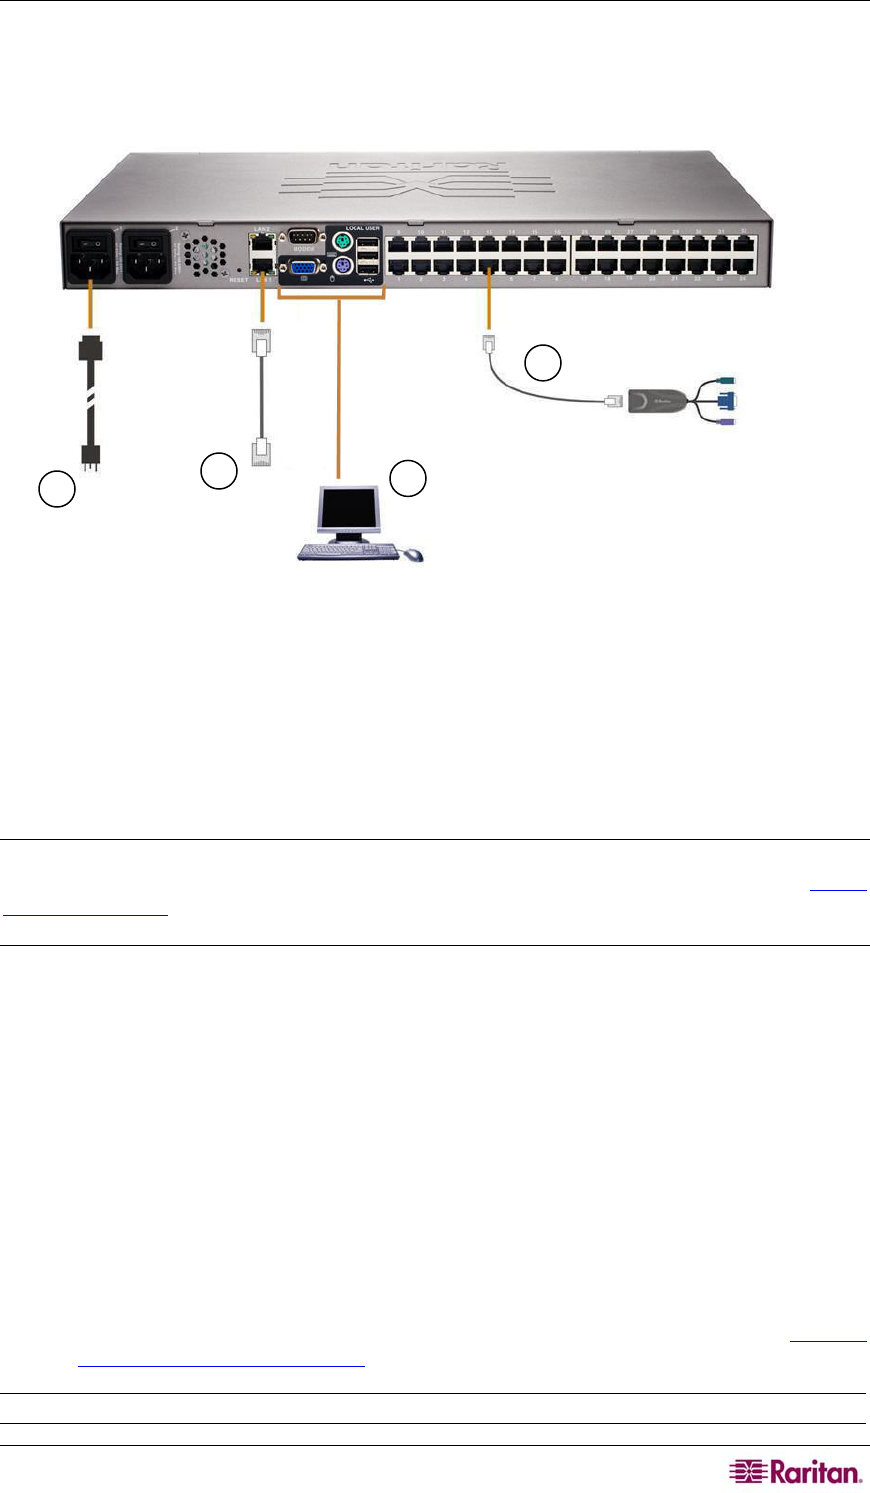
Connect the Dominion KX II to the power supply, network, local PC, and target servers. The
numbers in the diagram correspond to the sections describing the connection.
Figure 7: Dominion KX II Connections
1. AC Power
To connect the power supply:
1. Attach the included AC power cord to the Dominion KX II and plug into an AC power outlet.
2. For dual power failover protection, attach the second included AC power cord and plug it into
a different power source than the first power cord.
Note: If you only attach one power cord, the power LED on the Dominion KX II front panel will
display red because the system is set to automatically detect both sources. Refer to the Power
Supply Setup Page for information about turning off automatic detection for the power source not
in use.
2. Network Ports
Dominion KX II provides two Ethernet ports for failover purposes (not for load-balancing). By
default, only LAN1 is active and the automatic failover is disabled. When enabled, if the
Dominion KX II internal network interface or the network switch to which it is connected
becomes unavailable, LAN2 will be enabled using the same IP address.
To connect the network:
1. Connect a standard Ethernet cable (included) from the network port labeled LAN1 to an
Ethernet switch, hub, or router.
2. To make use of the optional Dominion KX II Ethernet failover capabilities:
• Connect a standard Ethernet cable from the network port labeled LAN2 to an Ethernet
switch, hub, or router.
• Enable Automatic Failover on the Network Configuration screen (refer to Network
Settings, LAN Interface Settings for more information).
Use both network ports only if you want to use one as a failover port.
1
2
4
